Skip to main content
What We Do
Innovation Awards
Music Accessibility
MIDI In Music Education
AI in Music and Games
Specs and Tech
Specifications
MIDI 2.0 Products
What's Happening
News
Events and Trade Shows
Forum
About
About Us
Membership
Get Involved
Sign Up
Login
What We Do
MIDI Innovation Awards
Music Accessibility
MIDI In Music Education
AI In Music and Games
Specs and Tech
Specifications
MIDI 2.0 Products
What’s Happening
Blog
Events and Trade Shows
Forum
About
About
Membership
Get Involved
Sign Up
Login
MIDI Hardware
MIDI and Artificial Intelligence
,
MIDI Association Event List
,
MIDI Hardware
,
MIDI News
The MIDI Association Welcomes PopuMusic as a New Member
DYI/Arduino/Maker/Robots
,
MIDI Association Event List
,
MIDI News
,
Music Accessibility Standard
CES 2026: MIDI Gear to Watch—and the Accessibility Tech That Can Change How We Make Music
MIDI Association Event List
,
MIDI Hardware
,
MIDI In Music Education
,
MIDI News
,
Music China
Interview with Robkoo’s Oscar Xie
Alternate Controllers
,
MIDI Hardware
,
MIDI News
,
MIDI Stories
Bionic and The Wires
Alternate Controllers
,
MIDI Association Event List
,
Music Accessibility Standard
The PhotoSYNTH and accessible music making
MIDI Hardware
,
MIDI Innovation Awards
,
MIDI News
,
MIDI Software
Voting In The 2025 MIDI Innovation Awards
MIDI Hardware
,
MIDI History
,
MIDI News
The History of Electronic Wind Instruments
MIDI Hardware
,
MIDI News
THE ORIGINS OF WAVE SEQUENCING
MIDI 2.0
,
MIDI Association Event List
,
MIDI Hardware
,
MIDI News
,
MIDI Resources for Developers
,
NAMM
MIDI 2.0 Drum Profiles
Digital Pianos
,
MIDI Association Event List
,
MIDI News
,
MIDI Resources for Developers
,
NAMM
The MIDI Association At NAMM 2025
MIDI Hardware
,
MIDI News
How I Made The MIDICard
MIDI 1.0
,
MIDI Hardware
,
MIDI News
,
MIDI Resources for Developers
,
MIDI Software
,
Music China
Digishow-Jam With Everything
Artists
,
MIDI Hardware
,
MIDI History
,
MIDI News
Anthony Marinelli and the Arp 2600 at the MIDI Association Booth NAMM 2024
Alternate Controllers
,
MIDI Association Event List
,
MIDI In Music Education
,
MIDI News
,
NAMM
More Playful Products with MIDI at NAMM 2022
Alternate Controllers
,
MIDI Association Event List
,
MIDI In Music Education
,
MIDI News
,
NAMM
Playful Products with MIDI at NAMM 2022
DYI/Arduino/Maker/Robots
A very MIDI Christmas and Happy Holidays 2021 to all
MIDI Association Event List
,
MIDI Hardware
,
MIDI In Music Education
A MIDI Controller has a MIDI Controller that sends MIDI Controllers
Alternate Controllers
,
MIDI Hardware
Playtronica’s Orbita Makes Making MIDI Music colorful and easy
Alternate Controllers
,
DYI/Arduino/Maker/Robots
,
MIDI Hardware
,
MIDI News
LEET Synth is everything we love-DIY, 3D Printable, Open Source, Modular and MIDI
Alternate Controllers
,
MIDI Hardware
,
MIDI News
,
Wind/Breath Controllers
Respiro from ImoxPlus turns your breath into an expressive instrument
Alternate Controllers
,
Artists
,
Creating with MIDI
,
DYI/Arduino/Maker/Robots
,
MIDI Hardware
,
MIDI News
Watermelons, Summer and MIDI from MEZERG
Alternate Controllers
,
DYI/Arduino/Maker/Robots
,
MIDI Hardware
Build a MIDI Controller with Arduino
MIDI Connections
,
MIDI Hardware
,
MIDI News
Jammy EVO, a next-gen stringed MIDI controller, on Kickstarter now
Alternate Controllers
,
Guitars
,
MIDI Hardware
,
MIDI News
Elk Audio OS for everyone!
Keyboard Controllers
,
May Is MIDI Month Sponsors
,
MIDI Hardware
,
MIDI News
,
MIDI Polyphonic Expression (MPE)
,
MIDI Product News
KMI K-Board Pro 4 with a Bitwig Studio 8-Track Bundle Makes MPE Easy
Alternate Controllers
,
MIDI News
,
MIDI Product News
Skwitch: Connect to your iPhone and start making music
Alternate Controllers
,
MIDI Hardware
,
MIDI News
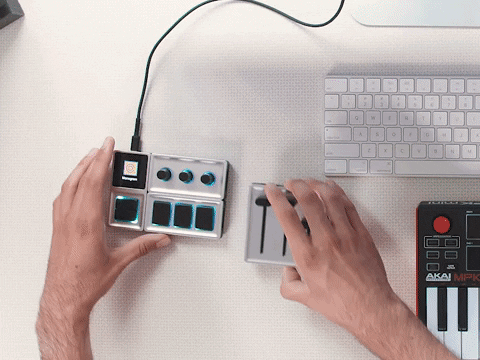
Monogram Creative Console – A Modular MIDI Controller
Alternate Controllers
,
DYI/Arduino/Maker/Robots
,
MIDI Hardware
,
MIDI News
Tristan Calderbank made a drum robot for acoustic music
Alternate Controllers
,
MIDI Hardware
,
MIDI News
,
Wind/Breath Controllers
Re.corder re.invented as a MIDI Controller
Alternate Controllers
,
MIDI Hardware
,
MIDI In Music Education
,
MIDI News
Audio Assemble-Video Tutorials, Product Reviews, & Pro Tools
Bluetooth Low Energy (BLE) Wireless MIDI
,
MIDI Connections
,
MIDI Hardware
,
MIDI News
GenkI Instruments Wave Ring is Now Shipping
Alternate Controllers
,
Electronic Drums
,
MIDI Hardware
Bitmi – New USB MIDI Drum Pad
Alternate Controllers
,
MIDI Hardware
,
MIDI News
Blokas Midihub Standalone MIDI Processor & Router
Alternate Controllers
,
Artists
,
MIDI Hardware
,
MIDI News
,
MIDI Stories
Ólafur Arnalds’ MIDI Generative effects and Pianos that go Bleep Bloop
Alternate Controllers
,
Guitars
,
MIDI Hardware
Jamstik Shares Plans for New Studio MIDI Guitar
Guitars
,
MIDI Hardware
,
MIDI News
,
MIDI Product News
How Fishman, Arturia and MIND Music Labs Followed their MUSE to a State of the Art Synth Guitar in 30 Days
Bluetooth Low Energy (BLE) Wireless MIDI
,
Keyboard Controllers
,
May Is MIDI Month Sponsors
,
MIDI Connections
,
MIDI News
,
MIDI Polyphonic Expression (MPE)
,
MIDI Product News
ROLI BLOCKS-Modular Wireless MIDI Touch System
Alternate Controllers
,
Bluetooth Low Energy (BLE) Wireless MIDI
,
May Is MIDI Month Sponsors
,
MIDI Connections
,
MIDI Hardware
,
MIDI News
IK Multimedia iRig Keys I/O
Keyboard Controllers
,
May Is MIDI Month Sponsors
,
MIDI News
,
MIDI Polyphonic Expression (MPE)
,
MIDI Product News
K Board Pro 4- Expressive Smart Sensor Keyboard
Alternate Controllers
,
Bluetooth Low Energy (BLE) Wireless MIDI
,
Guitars
,
MIDI Connections
,
MIDI Hardware
,
MIDI News
IK Multimedia iRig BlueBoard
Alternate Controllers
,
Bluetooth Low Energy (BLE) Wireless MIDI
,
May Is MIDI Month Sponsors
,
MIDI Connections
,
MIDI Hardware
,
MIDI News
,
Wind/Breath Controllers
Roland Brings Wireless MIDI to Digital Wind Instruments!
Artists
,
Creating with MIDI
,
DYI/Arduino/Maker/Robots
,
MIDI Hardware
,
MIDI News
,
MIDI Stories
Moritz Simon Geist aka “Sonic Robots” creates Techno Music Robots!
Alternate Controllers
,
Electronic Drums
,
MIDI Hardware
,
MIDI News
DrumSpider – MIDI -> Light Interface for beginner drummers
Bluetooth Low Energy (BLE) Wireless MIDI
,
MIDI Connections
,
MIDI Hardware
,
MIDI News
MIDIWrist turns your Apple Watch (and soon Siri) into a MIDI Controller
MIDI Hardware
,
MIDI News
Roland GO:PIANO with Alexa Voice Controlled MIDI
Alternate Controllers
,
MIDI Hardware
,
MIDI News
The Top 5 MIDI to CV Converters in 2018
Alternate Controllers
,
MIDI Hardware
,
MIDI News
OceanSwift Xbox Midi Controller
MIDI Hardware
,
MIDI News
midiBeam v2 ADVANCED WIRELESS MIDI TRANSMISSION SYSTEM
MIDI Hardware
,
MIDI News
,
MIDI Stories
The Novel Features of Kara MIDI Controller
Alternate Controllers
,
MIDI Hardware
MIDI Bag Pipes
Alternate Controllers
,
Guitars
,
MIDI Hardware
Jammy-A MIDI controller with real steel strings and authentic tone.
Alternate Controllers
,
MIDI Hardware
Oddball- A bouncing ball MIDI controller
Alternate Controllers
,
DYI/Arduino/Maker/Robots
,
MIDI Hardware
,
MIDI Innovation Awards
,
MIDI News
Sonoclast: Plastic Pitch Plus – Using MIDI to Experiment with Microtonality
Alternate Controllers
,
DYI/Arduino/Maker/Robots
,
MIDI Hardware
GRIDI is a large scale physical Midi sequencer
Alternate Controllers
,
MIDI Hardware
SoulPedal® Beta Testing Begins – A Wearable Expression Controller with MIDI in your Shoe?
Alternate Controllers
,
DYI/Arduino/Maker/Robots
,
MIDI Hardware
Tirare – MIDI String Instrument
Alternate Controllers
,
MIDI Hardware
Virtual organ console unit: how to let your MIDI devices play as an organ
Alternate Controllers
,
MIDI Hardware
XT Synth
Alternate Controllers
,
DYI/Arduino/Maker/Robots
,
MIDI Hardware
Curve – by Nathan M. Asman
Alternate Controllers
,
MIDI Hardware
Federation Bells in Birrarung Marr, Melbourne
Alternate Controllers
,
MIDI Polyphonic Expression (MPE)
MPE MIDI Live! Chat Podcast
Alternate Controllers
,
MIDI Hardware
Mixtela- A MIDI Stylophone Business Card, Music Box, and 5 Pin DIN Synth
Alternate Controllers
,
MIDI Hardware
How to make a MIDI compatible Stylophone
May Is MIDI Month Sponsors
,
MIDI Hardware
May 13-Why You Need a Controller with More Octaves
MIDI Hardware
,
MIDI News
May 08 How to Use Jamstik+ as MIDI Guitar
DYI/Arduino/Maker/Robots
,
MIDI Hardware
,
MIDI News
The Story of SMOMID
Alternate Controllers
,
MIDI Hardware
,
MIDI News
My Body is MIDI Controller by Daði Freyr
DYI/Arduino/Maker/Robots
,
MIDI Hardware
,
MIDI News
Cabot- MIDI Cahon
DJ gear
,
MIDI Hardware
,
MIDI News
AIR DJ controls Music, Visuals, and Lights with Motion
Alternate Controllers
,
MIDI Hardware
,
MIDI News
Genki Instruments Wave Controls Sounds with Motion
Alternate Controllers
,
MIDI Hardware
,
MIDI News
The Enhancia Ring MIDI Controller at CES 2018
MIDI Hardware
,
MIDI Innovation Awards
,
MIDI Stories
Herrmutt Lobby
Alternate Controllers
,
MIDI Hardware
Wiggle Kit: A Motion Controlled Effect Instrument for Singers
MIDI Hardware
,
MIDI In Music Education
,
MIDI News
,
MIDI Software
MICROTUNING AND ALTERNATIVE INTONATION SYSTEMS
DYI/Arduino/Maker/Robots
THE TOP MIDI DIY RESOURCES ON THE WEB
Alternate Controllers
,
MIDI Hardware
,
MIDI Stories
Mind To MIDI
Alternate Controllers
,
MIDI News
,
MIDI Product News
Copy of MIDI Polyphonic Expression (MPE) Specification Adopted!
MIDI Hardware
,
MIDI News
,
MIDI Software
MIDI and the Surface Pen
MIDI Hardware
,
MIDI News
,
MIDI Software
BLE-MIDI, Sonar and Zivix Jam Stick- A New Way to Enter MIDI into your DAW
DYI/Arduino/Maker/Robots
MIDI and Robots Part 2- Super Booth 2017
Electronic Drums
,
MIDI Connections
,
Web MIDI
A Web Developer’s Tale of the Octapad Revival
DYI/Arduino/Maker/Robots
,
MIDI News
,
MIDI Resources for Developers
Arduino MIDI Output Basics
DYI/Arduino/Maker/Robots
,
MIDI Stories
The Great American Horn Machine GAHM
DYI/Arduino/Maker/Robots
,
MIDI Hardware
A curated list of MIDI DIY projects on Instructables
Alternate Controllers
,
MIDI Hardware
Itty Bitty Squishy Things Roundup
Alternate Controllers
,
MIDI News
The MIDI Association and Bluetooth MIDI at 2016 SXSW
Alternate Controllers
,
MIDI Hardware
Alternative Controllers: Part 5 Hand-Held and Struck Controllers, and Controllers for Microtonal Tunings
DYI/Arduino/Maker/Robots
,
MIDI Hardware
MIDI Processing, Programming, and Do It Yourself (DIY) Components
Alternate Controllers
,
MIDI Hardware
Alternative Controllers: Was Part 5
Alternate Controllers
,
MIDI Hardware
Alternative Controllers: Part 1 from The Synthesizer by Mark Vail
Alternate Controllers
,
MIDI Hardware
Alternative Controllers: Part 4 from The Synthesizer by Mark Vail
Alternate Controllers
,
MIDI Hardware
Alternative Controllers: Part 3 from The Synthesizer by Mark Vail
Alternate Controllers
,
MIDI Hardware
Alternative Controllers: Part 2 from The Synthesizer by Mark Vail
DYI/Arduino/Maker/Robots
Imogen Heap Exclusive Interview
Alternate Controllers
,
MIDI Hardware
MIDI Electronic Light Scape Device (“eLSD”)
Guitars
,
MIDI Hardware
MIDI for Guitarists