fbpx
Skip to main content

Building a USB MIDI 2.0 Device – Part 3

This is the third part in this series on how developers go about building a USB MIDI 2.0 Device. Please read Part 1 and Part 2 before reading Part 3.

In Part 2 we looked at handling Function Blocks and Group Terminal Blocks, UMP Discovery. 

In this third guide we will cover:

  • Using a USB Descriptor Builder to avoid mistakes
  • Interfaces and Interface Association Descriptors in USB
  • Why having separate MIDI 1.0 mode may be useful
  • OS Caching and Firmware updates that affect your USB Descriptors

Using a USB Descriptor Builder to avoid mistakes

Creating correct USB Descriptors can be difficult to get right. Issues can occur such as

  • Incorrect lengths of descriptors
  • Difficulties when creating USB Endpoint with multi MIDI 1.0 Ports
  • Confusion between USB Endpoint In/Out to Embedded Out/IN to External In/Out Descriptors
  • IAD creation

To make this much easier, members of the MIDI Association and MIDI2.dev have created a MIDI USB Descriptor Builder. It allows you to create the Descriptors needed to create a MIDI 1.0/2.0 USB Device. Although the Descriptor Builder is catered to output descriptor for use with tinyUSB tusb_ump driver (https://github.com/midi2-dev/tusb_ump) or the Linux Gadget interface, the generated code should be easily adaptable to other USB stack implementations.

The USB Descriptor Builder is located at https://midi2-dev.github.io/usbMIDI2DescriptorBuilder/ 

The GitHub repository is located here

Parts 1 and 2 of this article include several examples of descriptors. Those examples are based on the default settings of the Descriptor Builder. The USB Descriptor sets many parameters and properties used by the device. It is also recommended that you consider the association of these parameters in relation to other UMP features, selecting values that are consistently formatted. In developing your USB device, be sure to reference the Property Names and Mapping article (https://midi.org/midi-2-0-device-design-property-names-and-mapping).

Interfaces and Interface Association Descriptors (IAD)

If a device supports both USB MIDI and USB Audio, the device should be configured as a Composite device with Audio Interfaces separated from MIDI Interfaces. This mechanism is particularly useful in devices which combine Audio Class version 2, 3, or 4 with a MIDI Class function. This is because the MIDI Class Function, defined as a subclass of Audio Class, has an Audio Control Interface.

An IAD is used to show the relationship between the Audio Interfaces, particularly to associate an Audio Control Interface with an Audio Streaming Interface(s).

A separate IAD is used to show the relationship between the Interfaces for the MIDI Function. This IAD associates a 2nd Audio Control Interface with a MIDI Streaming Interface.

USB Hosts may use the IADs to better determine which drivers will be used to support the device.

Two Alternate Settings: To Enable Backward Compatibility

The USB Device Class Definition for MIDI Devices, Version 2.0 defines how the use of 2 Alternate Settings on the Class Specific MIDI Streaming Interface provides the widest compatibility of Devices and Hosts.

Using this mechanism, a Device can operate as a MIDI 1.0 Device when necessary, but can switch to operating as a MIDI 2.0 Device on any Host which can support MIDI 2.0.

Alternate Setting 0 of the MIDI Streaming Interface is compliant with USB Device Class Specification for MIDI Devices Version 1.0.

Alternate Setting 1 of the MIDI Streaming Interface has descriptors for the MIDI 2.0 function.

The bcdMSC field in Alternate Setting 0 is set to 0x0100. (MIDI 1.0)

The bcdMSC field in Alternate Setting 1 is set to 0x0200. (MIDI 2.0)

USB MIDI Hosts which do not support USB MIDI 2.0 use the descriptors found on Alternate Setting 0 and install the Device as a MIDI 1.0 Device.

USB MIDI Hosts capable of supporting a USB MIDI 2.0 Device instead start by looking for an Alternate Setting 1 with bcdMSC set to 0x0200. If such an Alternate Setting is found in the device, the Host installs the Device as a MIDI 2.0 Device using those descriptors. If the Host does not find the Alternate Setting 1, then the Host will use the descriptors found on Alternate Setting 0 and install the Device as a MIDI 1.0 Device.

Why having separate MIDI 1.0 USB Only mode may be useful in some cases at this time

This may be done to be more compatible with and avoid unexpected behavior when used with some early beta versions of Host USB MIDI 2.0 drivers in 2023 and 2024. 

Initial USB MIDI 2.0 Devices, such as the Native Instruments Komplete Kontrol MK3 and the Roland A-88 MK2, store 2 sets of USB Descriptors :

  • Legacy MIDI 1.0 only
  • USB MIDI 2.0 (with alt 0 = MIDI 1.0, alt 1 = MIDI 2.0)

The user decides which to enable on the device. On the A-88MK2 this is a button combination on start up, on the Kontrol it is a menu option (which causes a reboot).

It is expected that with a short timeframe this will not be a concern and this suggestion will change. Ultimately, all Devices should simply have a single mode of operation which has an Alternate Setting 0 for MIDI 1.0 and an Alternate Setting 1 for MIDI 2.0.

OS Caching and Firmware updates that affect your USB Descriptors

When Devices connect to a Host, an OS may cache the USB Descriptors. For example CoreMIDI uses caching to build a database of MIDI Devices and to handle reconnects.

A Host might not be able to recognize when a device makes these kinds of changes::

  • USB Descriptors including string name changes
  • Group Terminal Block updates
  • Switching between a USB MIDI 1.0 only mode and USB MIDI 2.0 mode

If the Host OS does not recognize that a change has occurred, the user may experience errors and unknown behaviors. 

One method to avoid errors, the user needs to clear the cache and remove the prior device entry. However, this is not always possible and explaining the steps to users can be a challenge. This can be confusing and may still result in further technical support issues.

If the device can change the iSerial string value or the PID every time these notable configuration changes occur, then the OS will see a new device with a new set of features.

The End…

This set of articles would not have been possible without the input and support of the MIDI Association OSAPI Working Group members who provided much of the content.

Writing this series has helped me to clarify and organize my own understanding of  USB MIDI. The MIDI Association intends to continue publishing these kinds of articles to support developers.

Thank you to everyone else who provided information, asked probing questions, and read this series.

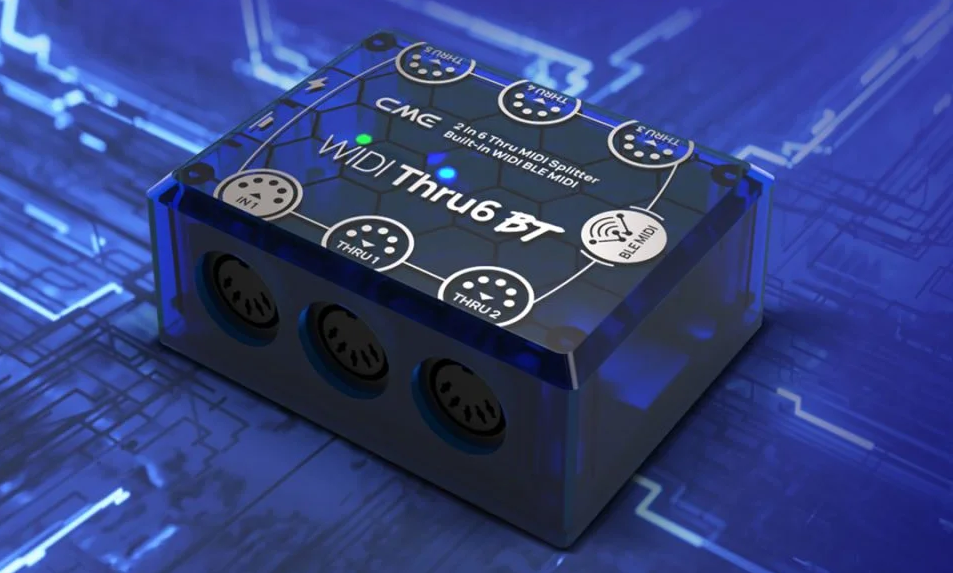
CME introduces hybrid MIDI Thru box with built-in Bluetooth MIDI

CME Pro, the small-scale innovator and contributing board member of the MIDI Association, is pleased to announce the world’s first hybrid MIDI-thru-box with premium Bluetooth MIDI.

Following the successful launch of its WIDI technology, CME is taking the next step with the introduction of WIDI Thru6 BT as the latest addition to the WIDI family.

WIDI Thru6 BT lets you combine wired and wireless MIDI through this 2-in-6-out MIDI thru/split solution for studio, stage and mobile music making.

 Break the barriers between smart devices and MIDI hardware

Powered by the latest Bluetooth 5 technology, the full WIDI range offers wireless MIDI solutions via Bluetooth for all MIDI devices. Both hardware and software. Both controllers and apps.
With its Smart Connectivity Algorithms and Adaptive Frequency Hopping, interference is minimised, performance range maximised (65ft/20m without obstacles) and latency reduced to an absolutely inaudible 3ms measured between 2 WIDI devices.
Moreover, the implemented 32-bit processor is fast, accurate, and efficient, delivering virtually no latency and jitter over wired MIDI.


 Connect up to 10 MIDI devices simultaneously

Simply merge and split 2 MIDI inputs to 6 MIDI outputs (through). Sync all your MIDI devices without data errors, without signal loss or drop-out for professional use on stage, in the studio and for mobile setups.

In addition, you can enjoy the convenience of advanced wireless MIDI as developed and designed by CME. This opens up a new world by adding motion controllers, wearables, smart devices and mobile devices to your MIDI setup.

Easily connect any MIDI devices with standard MIDI I/O via MIDI cables. Automatically connect to WIDI devices, standard Bluetooth MIDI controllers like the Xkey Air, and easily connect to iOS, macOS, Android and Windows (10/11).

And with advanced Bluetooth MIDI groups, you can connect up to 10 MIDI devices simultaneously through a single WIDI Thru6BT….

LASER Mammoth puts SysEx storage in your browser

They thought it was abandoned long ago and never would return. They were wrong. The ancient knowledge of the MIDI elders silently faded away and left them clueless and unprepared. How on earth should they have known how to deal with MIDI SysEx programs? In a world where all SysEx apps fail, one app must resist, one app must prevail: F0F7 – Codename LASER Mammoth – Midi SysEx Librarian F0F7 – Codename LASER Mammoth let’s you reorder, rename, delete and share your hardware synthesizer programs.

It’s Sysex in the browser.
It’s the future!
Make your MIDI synth awesome again.

by LASER Mammoth


...

F0F7 – LASER Mammoth

Sysex Librarian for your Synthesizer. Reorder, rename, delete and share your sound programs.

Zenbeats Free Offer for iOS & Android and 1.2 Update

In early April, Roland began offering the full unlocked version of Zenbeats for iOS and Android for free for the time being through the #rolandathome initiative. The giveaway garnered attention from Yahoo Finance, Discchord, KEXP, Trend Hunter, CDBaby Podcast, The Verge, and other outlets.

Whether making a first beat or tracking a full song, Zenbeats’ sounds and on-screen instruments make creation easy for first-timers and experienced musicians alike.

Users can develop an idea on a mobile device, then quickly export it for sharing and collaboration. Zenbeats also includes in-app lessons to sharpen musical skills. 

The full mobile version of Zenbeats iOS & Android Unlock V1 includes:

  • All bundled instruments, effects, and features
  • Unlocked SampleVerse + 500MB content pack
  • Unlocked track effects and mixing options
  • Up to 2,000 Loops and Presets
  • AUv3 support (iOS only)
  • Stem Exporting


Bluetooth MIDI Support, MultiVerb, Roland Cloud Integration, New Sound Packs 

With the 1.2 update, Zenbeats offers full Bluetooth MIDI integration. Users can utilize any Bluetooth-supported MIDI device, allowing for complete cable-free composing and track building. Zenbeats 1.2 also features Roland Cloud integration, allowing paid Roland Cloud members and Roland Account holders to use instruments—including ZENOLOGY—on macOS and Windows platforms. No purchase is required. Zenbeats MultiVerb, a brand-new effect features multiple halls, rooms, and plate reverb effects.

Zenbeats 1.2 also features MIDI effect routing to record output, MIDI Output support for Android, and Plug & Play functionality with A-88MIKII for Android. Other enhancements include a new fader style for Mixer, gesture scrolling, drum machine optimizations, and plugin browser.

Ultimate owners receive three new sound packs with the 1.2 update: Tone Ringer‘s electric pianos, the atmospheric sounds of Ambient Dreamscaper 2, and Indie Drums. 


ABOUT ZENBEATS

Roland Zenbeats is a music creation app designed to keep users in an effortless artistic flow. Get started on any device or platform. With its collection of both modern and legendary sounds, Zenbeats brings Roland’s history of innovation into a dynamic, accessible environment.

LEARN THE PIANO WITH YAMAHA AND FLOWKEY

 The best new way to learn piano. Learning with flowkey is easy and fun. Practice notes and chords interactively and receive instant feedback.

The idea behind flowkey is simple: “learn piano with songs you love.” And the flowkey app makes it easy to learn your favorite songs, whether your level is that of a Beginner, Intermediate, Advanced or Pro piano player!

Discover fascinating piano arrangements tailored to your level. Get started today and play your first song within minutes.


Click on the links below to see the Yamaha keyboards that qualify in your area.


...

Yamaha Cooperation | flowkey

As a new Yamaha customer you’ll get three months flowkey Premium for free. Play over 1000 premium-songs from classical to pop music.

Jammy EVO, a next-gen stringed MIDI controller, on Kickstarter now

On its mission of creating the right MIDI device for those who feel more comfortable with 6 strings than with 25 keys, Jammy Instruments is launching a compact stringed MIDI controller Jammy EVO that allows playing any instrument like playing guitar.

The Kickstarter campaign is already live on the link. Jammy EVO raised the goal of $50,000 in just one hour, and $100,000 in two days. 

Jammy EVO translates the guitar skills into any instrument to create in any genre by connecting to a laptop or smartphone with DAW. So anyone with even basic guitar playing skills can play the whole orchestra using just one device. And in self-isolation times, Jammy EVO is more relevant than ever, allowing music enthusiasts to be a one-man-band.

Yet another thing that makes EVO stand out is its portability: being disassembled in half, the device is only 17″. With its new collapsible frame design, EVO can be even more compact than its predecessor, so it can be used on the go, or when not played, it doesn’t take up much space in the bedroom studio. Further, improved ergonomics with more comfortable neck profile, optimized string spacing, more reliable construction of latch mechanisms make playing extremely delightful.

Jammy EVO is going to have a set of next-gen optical sensors that will reduce the MIDI latency to 8—10 ms, and also improve MIDI tracking. New mappable hardware controls will be added to the current push knob and accelerometer. Also, there will be a long-awaited lefty version.


Jammy Instruments – a music tech start-up, focused on building and bringing to market innovative musical hardware and software solutions aimed to make music practice and creation mobile and accessible. Jammy Instruments has achieved its initial success with their first product — Jammy Guitar. It has raised more than 260.000 USD during its 2017 crowdfunding campaign on Indiegogo and received Best In Show award at the Summer NAMM 2018 — the world’s largest music trade event. Now, equipped with feedback from the Jammy Guitar users’ community, Jammy Instruments is ready for the new endeavor.

CME Introduces WIDI: New milestone in Bluetooth MIDI

Introducing WIDI Master
CME has been the wireless MIDI expert since 2005. Our WIDI (Wireless MIDI) technology already serves thousands of professional musicians worldwide. After CME launched the Xkey Air (2015) and the WIDI BUD (2016) there has been ongoing conversations about advanced MIDI connectivity over Bluetooth. Following that CME present today the wireless MIDI over Bluetooth adapter: WIDI Master

With WIDI Master you can connect all your MIDI devices point-to-point wirelessly. No matter if they are master or slave. For instance, you can connect two standalone MIDI hardware devices. Also you can pair your Bluetooth MIDI controller with any standalone MIDI instrument.

What can you do with MIDI over Bluetooth?

MIDI to MIDI
Connect two standalone MIDI hardware devices with two (2) WIDI Masters.

Bluetooth (BLE) to MIDI
Pair your bluetooth MIDI controller with any standalone MIDI hardware device using one (1) WIDI Master.

MacOS/iOS BLE to MIDI
Play your standalone MIDI hardware (switch WIDI Master to slave mode) and pair it with your iOS device or Mac (For Windows and Android we suggest to use with our WIDI BUD)

What makes WIDI Master the most advanced wireless MIDI solution in the market?

Automatic pairing!
WIDI Master automatically pairs with any Bluetooth MIDI device. No more manual scanning and pairing of your Bluetooth devices.

Ultra low latency!
WIDI Master reduces latency by directly embedding the BLE MIDI protocol in its firmware. Bypass your computer and benefit from fast wireless MIDI connectivity.

Secure connection!
WIDI Master delivers the most reliable wireless MIDI connection with our customised antenna design and automatic panic mode.

No external power!
WIDI Master is a fully standalone wireless solution. There is no need for an external power source or battery.

Trusted technology!
WIDI Master is the successor of Xkey Air and WIDI BUD. Our wireless MIDI technology is already trusted by thousands of professional musicians worldwide.

With WIDI Master we reduce latency by directly embedding the BLE MIDI protocol in the firmware of the device. You can bypass your computer and use wireless MIDI with low latency.

CME Blog

What about the specs?

  • Wireless technology: Bluetooth (ver. 5), MIDI over Bluetooth Low Energy-Compliant
  • Connectors: 1x MIDI IN (5pin-DIN), 1x MIDI OUT (5pin-DIN)
  • Compatible devices: WIDI Master, WIDI BUD, Bluetooth MIDI controllers, iPhone/iPad/iPod Touch, Mac with Bluetooth 4.0 installed
  • Compatible OS: iOS 8 or later, OSX Yosemite or later
  • Firmware update: On the air by using WIDI PLUS software (iOS/ MacOSX)
  • Important: specification, designs and pricing are subject to change!

When will WIDI Master be available?
During our preorder phase we sold over 2,500 WIDI Masters in about 21 days. Besides this, we are currently testing Prototype III (April. 2020). We expect to deliver the first batch by the end of May 2020.  

Next steps will be introducing other members of the WIDI family, such as the HUB4 and UHOST and develop. those items further with our community. Also, we will start putting our distribution and retail network in place.

Furthermore, we are connecting with industry partners to embed our technology in future product lines. Are you interested? Do not hesitate to contact CME through info(at)cme-pro.com

WIDI Family: WIDI HUB4

What is WIDI Master?

Wireless MIDI? What about latency?

Reclouder-Hardware, Mobile App and Cloud Service

Reclouder- personal hybrid recorder 

MMA member CME based in Singapore was at Music China in October, 2019 and their new concept called Reclouder received an award as “Most Innovative Newcomer”.

Reclouder is a unique idea and actually more than just another hardware product. It’s actually a totally unique approach to solving recording for all creators including musicians, bands, DJs, and videographers. 

What reclouder is  

 Reclouder has three main components. 

Features

Reclouder hardware

  • Standalone two-channel audio recorder
  • Professional mic pre-amp for high quality audio
  • Compatible with all microphones (studio / live / video)
  • One-touch device control and record activation
  • Record instantly on removable SDHC card up to 32 GB
  • Upload automatically into the cloud with Wi-Fi internet
  • Unlimited device expansion for endless multitrack recording
  • Never miss exciting moment with smart record functions
  • Low profile and sturdy hard design for heavy usage on stage
  • Mountable to DSLR or camcorder with optional accessory

Mobile App

  • Compatible with Android and iOS smartphones
  • Link an unlimited amount of devices with bluetooth networking
  • Control the entire audio recording network with one touch
  • Start / Stop all units from the palm of your hand
  • Track, session, storage, device & user management

Cloud Service

  • Secure multitrack storage in the cloud
  • Start, pause and resume cloud uploading anytime with auto-sync upload
  • Automatically synchronise multitracks in same session
  • Compatible with all DAWs and audio production software tools
  • Enhance your audio with online mix & master services


What reclouder isn’t 

 With anything really unique and new, it is often necessary to explain what it is not. 

CME listed these things on their Blog.  But we have added some commentary of our own after looking at a lot of different information. 

  • Reclouder is not a scam
CME has released many innovative products in the past and has a reputation for being innovative. Their company moto is Always One Step Ahead.  They were one of the first companies to release a Bluetooth MIDI keyboard the Xkey Air. 
  • Reclouder is not a toy
The hardware product well designed with professional quality combo connectors and mic pre-amp .
  • Reclouder is not an audio over Bluetooth recorder
Audio is recorded internally to a Smart Card or if WIFI available via WIFI
  • Reclouder is not a content grabber that steals your copyrights

You control who has access to your Cloud files

  • Reclouder is not a replacement for a (live) mixing console
  • Reclouder is not comparable with recording on your mobile phone
  • Reclouder is not an audio interface
  • Reclouder is not replacing the sound engineer

Actually all of the above questions can have one simple answer. 

You have one dedicated combo input that can record mono (mic) and stereo (line). We’ve added a combo mic/line lossless audio thru option, especially useful for recording live music with a PA mixer. As you might have noticed there is no instrument input. We designed Reclouder as a microphone thru box. For guitar and bass players this means you either connect your pedalboard or your amp output on stage. This will keep your live recordings close to the original live sound your audience is experiencing.Enter your quote here…

by Reclouder

So what does this have to do with MIDI? 

One of the new technologies in the Reclouder is an innovative Bluetooth Mesh network to send synchronous recording MIDI commands from its mobile app to multiple Reclouders. This is the first time in the world MIDI is implemented in a Bluetooth Mesh Network, allowing you to control an unlimited amount of Reclouders via MIDI control messages simultaneously. This provides an easy to operate solution for decentralised multitrack recording. 


For more information, go to the Reclouder Indiegogo page.


...

Reclouder: Smart audio recording | Indiegogo

The fastest and easiest way to capture, store and sync high-quality audio recordings with one | Check out ‘Reclouder: Smart audio recording’ on Indiegogo.

PlantWave uses wireless Bluetooth MIDI to let plants sing

Data Garden, the people behind MIDISprout release new kickstarter campaign

Data Garden was started by Joe Patitucci and Alex Tyson in 2011 to explore the connection between plants, music and technology. In 2012, Data Garden was invited to produce a piece at The Philadelphia Museum of Art. They launched a Kickstarter in 2014 and by 2016 they had released their first product, MIDISprout, a MIDI instrument that translates plant biorhythms into MIDI to control audio and video synthesizers in real time. 

Data Garden worked with engineer and developer, Sam Cusumano, who created a system that translated micro fluctuations in conductivity on the surface of a leaf into MIDI that could control hardware and software synthesizers. This MIDI data was then translated into harmonious music through Joe Patitucci’s algorithmic composition and sound design. The result was Data Garden Quartet, a plant music performance with four tropical plants playing music in harmony.

by Data Garden

We covered this topic in an article from 2017 – Music, Plants, MIDI and the founder of the CIA Polygraph Unit! 


...

Music, Plants, MIDI and the founder of the CIA Polygraph Unit!

MIDI gets used for so many different things and one interesting MIDI application is plant music. The story of MIDI and plants starts quite naturally with the CIA. 

Plant Wave Features

PlantWave will allow you to wirelessly connect from your plant to your phone, making it easier than ever to listen to nature’s song. With WIFI, Bluetooth and USB connectivity all a part of this device, we’re clearing new paths to your plant music listening experience. With a built-in LI battery, your PlantWave will help you recharge with hours of listening enjoyment!

by Data Garden

Hardware

  • Bluetooth streaming via Bluetooth Low Energy / BLE MIDI
  • WIFI connectivity for firmware updates
  • USB for power and for MIDI transmission to computers and/or pro audio equipment
  • Built-in rechargeable LI Battery
  • Low Power Mode
  • Durable enclosure made of renewable / recycled materials
  • Sustainable manufacturing practices

Software Standard

  • Apps for iOS and Android
  • Library of Sound Sets (groups of instruments to be played by the plant)
  • Record Audio
  • Record + Share video
  • Standard data visualization (graphs, etc)
  • Change MIDI channel on firmware for customized use with pro audio equipment

Software Advanced 

  • Customizable sounds
    • Instruments
    • Effects
    • Key/Scale
    • 440hz / 432hz / 528hz, etc
    • Record MIDI
    • MIDI Thru

Software Pro

  • Build sound sets with multiple instruments
  • Multi Mode (route up to 4 PlantWaves!)
  • Auto key detection

  • PlantWave Plant Music Device
  • Electrode leads
  • 3 pairs of sticky pads for leaves
  • Duck beak clips for smaller plants
  • Micro USB cable for charging / data transmission
  • Free iOS / Android App

GenkI Instruments Wave Ring is Now Shipping

Genki Instruments announced that they were shipping Wave, the ring that lets you control sound with motion. With three easy-to-use buttons, Wave allows musicians to easily change sounds, parameters and effects using gestures. Since being funded on Indiegogo, many well known musicians have used the Genki Wave on stage and in the studio. 

Bergur Þórisson used the Wave on the Björk’s Utopia Tour in 2018.

“Wave adds a new dimension to musical creativity. It took me a while to realize that the best thing about Wave is not only that it can replace some of the tools you already have to control stuff when you are making music, but that it can make you control stuff in a completely different way, therefore making decisions that you would have never made without it. It’s a cool tool for all creatives and I can definitely recommend adding it to your workflow, whether you use it to replace your old techniques or invent new ones.”

by Bergur Þórisson

Richard Devine, electronic musician, producer and sound designer also uses Wave along with Wavefront, the Eurorack receiver also developed by Genki Instruments. 

Wave has 6 functions you can use individually or mixed together to control your sounds. 

Four different motions allow you to control any parameter in a new way. By tapping any surface you can trigger notes or samples. Easily accessible buttons on the ring allow you to cycle between presets, send commands and simply pause Wave so you can move your hands freely without changing anything.

You can easily customize each function to suit your setup. You can for example customize

  • Movement range
  • Sensitivity of taps (how hard you need to hit the surface)
  • CC values of output
  • Which note values are sent out by taps and button clicks
  • And more…

It’s compatible with: 

Hardware

A computer with built in bluetooth 4.0+

Mac OSX 10.10+

Windows 10 v.1809

iOS 8+

Android 6+

Software

All DAWs that can map MIDI

All iOS Applications that can map MIDI

All Android applications that can map MIDI

You can find more information on the Genki website.

The Cloud Piano by David Bowen

What does the weather sound like?  

David Bowen is an artist who uses data.  He has used data to point an installation of 50 twigs in unison towards the largest piece of space junk currently overhead. He used data to allow the flight of flies to control, aim and shot a revolver. He is not a musician, yet he used MIDI Manufacturer Association member Ableton’s Max MSP software to create a Cloud Piano, a piano played by clouds.

in this installation, Bowen used Max MSP and mapped Video to MIDI so that whenever a cloud passes over a note on the keyboard, the MIDI controller robotic arms presses the keys on an acoustic piano for the duration the clouds are over them. If there’s more white than blue detected, the key is pressed.

He went further and mapped multiple different video attributes to MIDI parameters. Tempo and rhythm are naturally related to how quickly the clouds are moving. Dynamics are controlled by how brightness, the more white in the video, the louder the sounds are played by generating higher MIDI velocities. Even the overall feeling of the music is based on the video input.  Clouds moving in one direction are processed to have a major feel, Clouds moving the in opposite direction are processed with more minor tonalities. 

Of course, this installation wouldn’t work well in Southern California.  There would be too many days when there was no sound at all because there were no clouds in the sky.  It might not work well in Seattle in the winter when skies are overcast for months on end. But we never cease to be amazed at the creative ways artist come up with to use MIDI. 

Here is a Youtube video from Great Big Story “That’s Amazing” about how the installation was put together. 

ROLI BLOCKS-Modular Wireless MIDI Touch System


BLOCKS is a modular music making system made up of 5 components


Seaboard Block Super Powered Keyboard

  • Multi-award-winning Seaboard interface
  • 5D Touch technology
  • 24 keywave, two-octave playing surface
  • Hundreds of free sounds
  • Suite of music making software for desktop and mobile
  • Wireless and portable for making music on the go
  • Connects to other Blocks


Lightpad Block Expressive Musical Touchpad

  •  Touch responsive soft silicon playing surface
  • LED illumination reconfigures Lightpad M for different notes and scales
  • Adaptable surface can become a drum pad, fader bank, effects launcher and more
  • Hundreds of free sounds
  • Suite of music making software for desktop and mobile
  • Wireless and portable for making music on the go
  • Connects to other Blocks


Perform with the Live Block

 The Live Block is for performance. The buttons let you switch scales and octaves, trigger chords and arpeggios, and sustain notes in real time.


Touch Block-Add Expression Faster

Touch Block helps you adjust the expressive behavior of your Seaboard Block and Lightpad Block. Turn up or turn down the responsiveness of the surface to the Strike, Glide, Slide, Press, and Lift dimensions of touch. Maximize the depth of expression available through pressure, or minimize the pitch-bend effect of sideways movements. Customize your control of any sound in real time and on the fly.


Loop Block-Produce Faster
 

Loop Block helps you produce a track faster. Record loops and play them back. Set your tempo, and quantize your loops so they’re always in time. 


ROLI Dashboard 

Customize BLOCKS and the Seaboard RISE for your workflow 

Blocks become open-ended MIDI control surfaces through ROLI Dashboard. Customize the LED-illuminated Lightpad Block by loading different apps, including a note grid, a bank of faders and more. Use Control Blocks as CC controllers for your favorite DAW. 


IK Multimedia iRig Keys I/O

MIDI Controller/Audio Interface for mobile musician

The iRIg Keys I/O comes in two version a a 25-key MIDI controller version and a 49-key MIDI controller version.  Both feature built-in audio interfaces with 24-bit/96kHz sound quality, a Neutrik combo input, and phantom power and eight touch-sensitive RGB LED backlit drum pads.

iRIG I/O 25

iRIG I/O 49


Complete suite of music production software included

 The iRig Keys I/O 25 comes with all the software you need to start creating music. Ableton Live Lite is the perfect DAW to get started with and IK Multimedia adds RackS Deluxe with 10 i mixing and mastering tools and  SampleTank 3 with 4,000 rinstruments, 2,500 rhythm loops, and 2,000 MIDI files. If you are mobile musician, SampleTank iOS for iPad and iPhone is a full-featured mobile sound and groove production studio.

Ableton Live lite

Sample Tank 3

T-RackS Deluxe


IK Multimedia iRig Keys I/O 49 Features:

  • MIDI controller with 49 full-size, velocity-sensitive keys
  • 8 touch-sensitive RGB LED backlit drum pads for beat creation
  • Touch-sensitive sliders and buttons plus touch-sensitive rotary controllers for controlling soft synths and other apps
  • Built-in USB audio interface features excellent 24-bit/96kHz sound quality
  • Neutrik combo input with phantom power handles nearly any microphone or instrument
  • Stereo line output and headphone jack provides ample monitoring options
  • Mac/PC/iOS compatible (MFi certified, lightning cable included)
  • Powered via USB (Mac/PC), batteries (iOS), or optional power supply (sold separately)
  • Includes full versions of T-RackS Deluxe, SampleTank 3, Miroslav Philharmonik 2 CE, Ableton Live Lite, and SampleTank iOS for iPad and iPhone
  • iOS stand is included

IK Multimedia iRig BlueBoard

Bluetooth LE MIDI Pedalboard for controlling iOS and Mac apps

The IK Multimedia Blue Board uses the new BTLE (Bluetooth Low Energy) MIDI specification so you can control your music apps wirelessly with your feet! 


If you’re using iOS apps such as IK Multimedia’s AmpliTube, you can now send control messages to them for up to 32.8 feet via Bluetooth MIDI connection.


There are two expansion TRS jacks for expression pedals to give you more control over your sound.  


IK Multimedia iRig BlueBoard Features:

  • Wireless Bluetooth technology that functions up to 10 meters (32.8 feet)
  • 4 backlit control pads with additional LEDs that light when the pad is active
  • 2 expansion 1/4″ TRS jacks for additional expression pedals
  • Compatible with Mac and iOS devices
  • Powered by 4 standard AAA batteries
  • Small enough to fit in a laptop bag


Roland Brings Wireless MIDI to Digital Wind Instruments!

As one of the inventors the Musical Instrument Digital Interface, Roland has continued to push the boundaries of the now 36-year old protocol(!) by continuously developing MIDI-based applications which bring totally new creative opportunities to musicians. One such application is the Roland AE-05 Aerophone GO, a unique digital wind instrument which uses MIDI (and Audio) over Bluetooth to dramatically expand the playing experience.

Connecting to a compatible iOS or Android mobile device using Bluetooth allows the Aerophone GO to interact with a range of apps including Roland’s own Aerophone GO Plus and Aerophone GO Ensemble.  

With Aerophone GO Plus, a player gains 50 new sounds triggered by MIDI over Bluetooth and can jam along to their favorite songs from their smartphone. In addition to an integrated metronome, the app also allows for customizing the connected Aerophone to suit the player’s technique, with all changes being communicated by MIDI over Bluetooth. 

A second app, Aerophone GO Ensemble, connects up to 7 players with a single mobile device for group performance using a common bank of sounds, all facilitated by MIDI over Bluetooth. Whether the application is a lesson with teacher, a duo performance, or a complete ensemble, MIDI over Bluetooth supports a unique wireless playing experience that would have been difficult to imagine 30+ years ago! 


Not only the volume but also the sound itself is dynamically affected by the force with which you blow into the mouthpiece and the strength with which you bite it, providing a natural and richly expressive sound. 

by Roland


The Aerophone has tons of internal sounds and built-in speakers, but it is also a great MIDI controller. Here are some of the parameters you can control on the Aerophone AE-10. The Bite Sensor can control pitch and vibrato. The strength of your breath effects not only volume, but other parts of the sounds 


...

Roland – Aerophone GO | Digital Wind Instrument

Aerophone GO: Digital Wind Instrument – Explore the Inspirational World of Wind Instruments

Yamaha Soundmondo-Social Sound Sharing using Web MIDI

What is Social Sound Sharing?

Yamaha originally launched the Soundmondo website and mobile app in 2015 for the reface line of keyboards.  It was one of the first major website to utilize Web MIDI. 

Connect your reface keyboard to your computer, iPAD or phone, launch Chrome as your browser and you can browse sounds shared by other reface owners, You can create and share  your sounds with people around the world. 

There are over 20,000 free reface sounds available online. 

“Soundmondo is to sound what photo-sharing networks are to images.It’s a great way to share your sound experiences and get inspiration from others.”

by Nate Tschetter, marketing manager, Synthesizers, Yamaha Corporation of America.

Yamaha has since expanded SoundMondo to include other Yamaha keyboards including the Montage. MODX and CP88/73 stage pianos. 

So exactly how does social sound sharing work?  Well, it’s actually pretty simple. You select your instrument and then you can browse by tags so for example all the sounds that have the tags 2000s, EDM and Piano. 

Select the sound and it is sent from the Soundmondo server to your browser and from your browser to your keyboard where you can play. If the synth or stage piano can store sounds, you can store the sound locally on your keyboard.  Using the SoundMondo iOS app, you can create set lists and organize your sounds for live performance. 

When Yamaha launched Soundmondo compatibility for Montage they produced 400 MONTAGE Performances, including content from the original DX ROM Cartridges, special content from Yamaha Music Europe and 16 original Performances from legendary synthesizer sound designer Richard Devine. 

You can see Richard’s performance using the Montage and Richard’s modular setup at Super Booth 2018.

data-href=”https://www.facebook.com/yamahasynths/videos/1467462910048911/”

data-width=”auto”
data-allowfullscreen=”true”
>

 Richard will be at Super Booth again this year creating amazing sounds with  the new Yamaha MODX. 


MIDIWrist turns your Apple Watch (and soon Siri) into a MIDI Controller

Geert Bevins’ watch app lets you wear your MIDI controller on your wrist

Geert Bevin (who was one of the main people who developed MIDI Polyphonic Expression)  recently released MIDIWrist.  MIDIWrist truns your Apple Watch intoa MIDI controller. 

Here is a pre-release demo using the Moog Model D iPhone app (Geert does a lot of work for Moog).


The Apple Watch has some real advantages as a MIDI controller because it provides  haptic feedback (the use of touch to communicate with users). 

MidiWrist turns your Apple Watch into a wireless MIDI controller.

The tactile feel of the digital crown combined with haptic feedback, gives you control over any MIDI synthesizer by touching your wrist, even when you’re not looking.

MidiWrist makes no sound on its own and requires an Apple Watch to function.

Any CoreMIDI application or device can be controlled by MidiWrist. This includes Virtual MIDI, Network MIDI, Bluetooth MIDI and Physical MIDI Devices through a supported MIDI hardware interface.

Features:

• Four knobs can be controlled with the digital crown

• Macro control over multiple synth parameters from the Digital Crown

• Remotely Play / Stop / Record / Rewind your DAW from your Watch

• Knobs can be controlled individually or simultaneously

• Knobs can be linked to preserve their offsets

• Four buttons can be toggled by tapping the Watch

• Buttons can either be stateful or momentary

• Program changes through the digital crown or by tapping the Watch

• Transport control over MIDI Machine Control (MMC) or Mackie Control Universal (MCU)

• Scrub transport with the digital crown

• Save / Undo / Toggle Cycle / Toggle Click through MCU

• XY pad with individual messages for each axis

• Optional haptic feedback for all Watch interactions

• Optional value display on the Watch

• Configurable colors for all knobs and buttons

• Configurable labels for knobs and buttons

• Configurable MIDI channels and CC numbers

• Hide the Watch pages that aren’t needed

• Save your configurations to preset for easy retrieval

• MIDI learn for easy controller configuration

• MIDI input to sync the state of the controllers with the controlled synths

• Advertise as a Bluetooth MIDI device

• Connect to other Bluetooth MIDI devices

• Monitor the last MIDI values on the iPhone

• Low latency and fast response

2


by Geert Bevin


SIRI voice control coming soon 

Soon MIDIWrist will allow you to control SIRI bringing voice command control of MIDI to your DAW.   We always find it amazing how MIDI adopts to the newest technologies to always stay relevent. 


MIDIWrist Screenshots 


...

‎MidiWrist on the App Store

‎Read reviews, compare customer ratings, see screenshots, and learn more about MidiWrist. Download MidiWrist and enjoy it on your iPhone, iPad, and iPod touch.

Telemidi – Creating music over The Internet in real-time

What is Telemidi?

A system of connecting two DAW environments over the internet, to achieve real-time musical `jamming’.
The product of Masters research by Matt Bray.


“…a musician’s behaviour at one location will be occurring at the other location in a near synchronous manner, and vice versa, thus allowing for a `jam’ like atmosphere to be mutually shared.”

Matt Bray (Telemidi creator)

Telemidi is an approach to Networked Music Performance (NMP) that enables musicians to co-create music in real-time by simultaneously exchanging MIDI data over The Internet.  Computer networking brings with it the factor of latency (a delay of data transfer), the prevalent obstacle within NMP‘s, especially when attempting to match the interaction of traditional performance ensembles.  Telemidi accommodates for latency via the use of numerous Latency Accepting Solutions (LAS – identified below) embedded within two linked DAW environments, to equip performers with the ability to interact in a dynamic, interactive and ongoing musical process (jamming).  This is achieved in part by employing RTP (Real Time Protocol) MIDI data transfer systems to deliver performance and control information over The Internet from one IP address to another in a direct P2P (peer to peer) fashion.  Once arriving at a given IP address, MIDI data is then routed into the complex DAW environment to control any number of devices, surfaces, commands and performance mechanisms.  Essentially, a musician’s behaviour at one location will be occurring at the other location in a near synchronous manner, and vice versa, thus allowing for a `jam’ like atmosphere to be mutually shared.  As seen in the video listed below, this infrastructure can be applied to generate all manner of musical actions and genres, whereby participants readily build and exchange musical ideas to support improvising and composing (`Comprovising’).  Telemidi is a true Telematic performance system. 


What is Telematic Performance?

Telematic music performance is a branch of Network Music Performance (NMP) and is a rapidly evolving, exciting field that brings multiple musicians and technologies into the same virtual space. Telematic Performance is the transfer of data and performance information over significant distances, achieved by the explicit use of technology. The more effective the transfer the greater the sense of Telepresence, the ability of a performer to “be” in the space of another performer.  Telematic performances first appeared when Wide Area Networking (WAN) options presented themselves for networked music ensembles via technologies such ISDN telephony, and options increased alongside the explosion of computer processing and networking developments that gave rise to The Internet.  Unfortunately in this global WAN environment, latency has stubbornly remained as a constant and seemingly unavoidable obstruction to real-time ensemble performance.

Telematic performance has been thoroughly explored by countless academic, commercial and hobby entities over the last four decades with limited successes. The musical performances have taken many forms throughout the exponential development of computing technologies, yet have been more-or-less restricted by latency at every turn.  For example, there is the inherent latency of a CPU within any given DAW, the additional processing loads of soft/hardware devices, the size and number of data packages generated in a performance, and the delivery of this data over The Internet which in turn presents issues regarding available bandwidth, data queuing, WiFi strength etc.. This is but one side of the engagement as we also have the DAW requirements of the reciprocating location, and of course the need for synchronous interplay between the two. Real-time NMPs suffer at the whim of network jitter, data delays and DAW operations.


How Telemidi Works

Telemidi works by exchanging MIDI data in a duplex fashion between the IP addresses of two performers, each of whom are running near-identical soft/hardware DAW environments.  A dovetailed MIDI channel allocation caters for their respective actions while avoiding feedback loops, in a system with the potential to deliver performance information to and from each location in near real-time (10-30ms).

To achieve this musical performance over The Internet, the Telemidi process employed:

1 – Hardware – a combination of control devices

2 – Softwaretwo near-identical Ableton Live sets

3Latency Accepting Solutions (LAS) – ten examples

4 – RTP MIDI facilitating the delivery of MIDI data to a WAN.  

Click on the tabs below for a summary of items used at each node location during the research stage of the Telemidi research (for more information and to download the Masters thesis go to www.telemidi.org): 

 Below is a list of hardware used at each location in the Telemidi research:

Lap-top Computers:  + Mac and Windows computers used, demonstrating Telemidi accessibility.


Novation SL Mk II

Novation SL Mk II MIDI controller keyboard


+ High capacity for customised MIDI routing (both control and performance data)

+ Traditional musical interface (keyboard)


Novation LaunchPad Pro

Novation LaunchPad Pro


+ Native integration with Ableton Live

+ Contemporary `Grid-based’ composition process 

 Software

 LAS

Ableton Live 

Near-identical Live sets (duplex architecture)
7 pre-composed songs (each split into four sections, A, B, C & D)
54 additional percussion loop patterns
12 x Synth Instruments (Native and 3rdparty)
Synths: 4 each of Bass/Harmony/Lead
16 DSP effects processers (with 2 or more mapped parameters)
286 interleaved MIDI mappings within each Live set
13 of 16 MIDI Channels used for shared performance and control data
Tempo variation control
Volume & start/stop control for each voice (Bass, Harmony & Melody)
Record and Loop capacity for each voice (Bass, Harmony & Melody)

LATENCY ACCEPTING SOLUTIONS (LAS):

The following processes adapt to and overcoming (cumulatively) the obstacle of latency.  They are ranked in order of efficiency from 1 (most efficient) to 10 (least efficient).

LATENCY ACCEPTING SOLUTION JUSTIFICATION
1 – One Bar Quantisation All pre-composed, percussive and recorded loops are set to trigger upon a one bar quantization routine, allowing time (2000ms @ 120bpm) to accommodate for network latency between song structure changes (most commonly occurring on a 4 to 8 bar basis).
2 – P2P (Peer ) Network Connection: Direct delivery of MIDI data from one IP address to the other. A simple direct delivery. No third party `browser-based’ servers used to calibrate message timing.
3 – Master Slave Relationship:  One node (Alpha) was allocated the role of Master and the other (Beta) the role of slave, allowing for consistent, shared tempo and a self-correcting tempo alignment following any network interference.
4 – Pulse-based music (EDM) as chosen genre for performance:

A genre without reliance on a strict scored format, rather a simple and repetitive pulse.
5 – Floating Progression (manner of Comprovising ideas) Each performer initiates an idea or motif, the other responds accordingly and vice-versa (jamming), any artefacts of latency only play into this process.
6 – 16thNote Record Quantize

Inbuilt Ableton function ensuring any recorded notes quantized to the grid.
7 – MIDI Quantize

3rdparty Max4Live device (16th note) puts incoming WAN MIDI onto the grid of the receiving DAW.
8 – Manual Incremental Tempo Decrease In the event of critical latency interference, tempo can be reduced incrementally, thus extending the time between each new bar and granting time for the clearance of latency issues.
9 – Kick drum (bar length loops) During a period of critical latency interference, a single bar loop of ¼ note kick drum events is triggered to maintain the “genre”.
10 – Stop Buttons During any period of critical latency interference, each voice (beats, percussion, bass, harmony or melody) can be stopped individually to reduce the musical texture, or to stop harmonic dissonance and stuck notes.

RTP MIDI

+ MacOS – AppleMIDI accessed through `Audio MIDI Setup’

+ Windows – rtpMIDI software used (created by Tobias Erichsen)

Success of Performance

Two performances were undertaken in the Telemidi research, the first with each performer 7.5km (4.6 mi) apart, and the second 2,730km (1,696 mi) apart.  Both were recorded and then analysed in detail (see video below), whereby aspects of performance parameters and methods were identified alongside several fundamental principles of Telematic performance.  A stream of audio is generated from each node and each has been analysed in the video to identify the interplay between the two musicians, highlighting any variations in the music created and to recognize artefacts of network performance.  It was noted that the music generated at each node was strikingly similar, although subtle variations in the rhythmic phrasing of bass, harmony and melody were common.

The Telemidi system ably accommodates all but the most obtrusive latency yet provides each musician with the capacity to co-create and Comprovise music in real-time across significant geographic distances.  These performances showed constant interplay and the exchange of musical ideas, as can be seen in the 16 minute analysis video below, leaving the door open for many exciting possibilities in the future.


16min Video Analysis


Future Plans

The principles of Telemidi were the focus of Matt Bray in his 2017 Masters research.  Now the Telemidi process has been proven to function, the landscape is open to allow for musicians to create and interact with each other in real-time scenarios regardless of their geographic locations.

The next steps are to:

+ Recruit keen MIDI-philes from around the globe to share and exchange knowledge in regards to the potentials of the Telemidi process (if this is you, please visit www.telemidi.org and leave a message)

+ Identify the most stable, low latency connections to The Internet available, to begin test performances across greater geographic regions

+ Refine and curate the infrastructure to suit various genres (from EDM to contemporary, also including live vocalists/musicians at each location)

+ Produce and promote simultaneous live performance events in capital cities, first nationally (Australia) and then internationally.

If you are at all interested in contributing to, or participating in the Telemidi process, please contact me, Matt Bray at www.telemidi.org, I’d love to hear from you and see what possibilities are achievable. 

Thanks for checking out Telemidi!!

Matt Bray


Google Releases Song Maker with Web MIDI

Google Creative Lab, Use All Five, and Yotam Mann launched a new browser-based music sequencer called Song Maker. 

It’s a classic grid style sequencer and allows anyone to easily create simple grooves on the web.  You can even connect your MIDI keyboard or other controllers to input notes via Web MIDI. 

When you’re finished you can save your Song Maker groove, share it on Facebook and Twitter or even get the embed code to embed Song Maker on your website.  Check it out below!


.


Creating a MIDI Collaboration App using Express.js & Socket.io

 Want to make music with your friends on Internet. This tutorial  from Andrew Bales will show you how to build an app that allows you to collaborate with friends to make music in real-time! 

Try out a live demo: https://midi-collaboration.herokuapp.com/

Check out the code: https://github.com/agbales/web-midi-collaboration

by Andrew Bales

As you can see, playing a note lights up a key in pink and displays the input data in the list. If another user joins the session, their input will light up blue and their data will appear in the list as blue entries.

We’ll break the process into 5 parts:

      1. Creating an App with Express.js
      2. Connecting a Midi Controller
      3. Adding Socket.io for Collaboration
      4. Styling
      5. Deploying to Heroku

Step 1: Creating an Express.js App

We’ll get started by making a directory and initializing the project with these three terminal commands:

mkdir midi-collaboration
cd midi-collaboration
npm init

The NPM utility will ask for a bit of information to set up the package.json file. Feel free to provide that info or just hit enter to leave these fields blank for now.

Next, add Express:

npm install express --save

In package.json, you will now see Express included as a dependency.

In the root folder, make server.js with:

touch server.js

In server.js, add the following:

var express = require('express');
var app = express();
const port = process.env.PORT || 8080;
var server = app.listen(port);
app.use(express.static('public'));

This creates an instance of Express and sets the port that defaults to 8080. app.use instructs express to serve up files from the ‘public’ folder. If you ran the server now, you’d get an error. That’s because we don’t yet have a public folder!

Public folder

Let’s make that public folder:

mkdir public
cd public

Inside, we’ll make index.html, index.js, and a CSS folder containing style.css:

touch index.html
touch index.js
mkdir css
cd css
touch style.css

The ‘public’ folder should look like this:

public
--> index.html
--> index.js
css
--> style.css

Index.html should link to style.css and index.js. So let’s add the following:

<!-- /public/index.html -->
<html>
<head>
<title>Midi Collaboration</title>
<link rel="stylesheet" href="/css/style.css">
</head>
<body>
<div>
<h1>MIDI Collaboration</h1>
<ul id="midi-data">
</ul>
</div>
</body>
<script src="/index.js" type="text/javascript"></script>
</html>

This makes a simple header followed by an empty unordered list — this is where we’ll log our midi data. After the body, it references index.js. For now, let’s add a simple console.log to index.js so that we’re sure it’s working properly:

// public/index.js
console.log('index.js is connected!');


Update package.json

Finally, we want to update package.json so that we can run our server with the terminal command ‘npm start’. Add the following line to “scripts”:

"start": "node server.js"

Your package.json should look like this:

{
"name": "remaking-midi-maker",
"version": "1.0.0",
"description": "",
"main": "index.js",
"scripts": {
"test": "echo \"Error: no test specified\" && exit 1",
"start": "node server.js"
},
"author": "",
"license": "ISC",
"dependencies": {
"express": "^4.15.3"
}

Make sure you’re in the midi-collaboration folder and start up your app:

npm start

Great! It’s now hosted at http://localhost:8080/

Step 2: Connecting your Midi Controller

We’ll use the Web Midi API to connect a USB midi controller to the app. If you’re seeing ‘index.js is connected!’ in your console, let’s replace the console.log with:

// public/javascript/index.js
var context = new AudioContext();
var oscillators = {};
var midi, data;
if (navigator.requestMIDIAccess) {
navigator.requestMIDIAccess({
sysex: false
}).then(onMIDISuccess, onMIDIFailure);
} else {
console.warn("No MIDI support in your browser");
}
function onMIDISuccess(midiData) {
console.log(midiData);
midi = midiData;
var allInputs = midi.inputs.values();
for (var input = allInputs.next(); input && !input.done; input = allInputs.next()) {
input.value.onmidimessage = onMIDImessage;
}
}
function onMIDIFailure() {
console.warn("Not finding a MIDI controller");
}

If your midi controller is hooked up, you should see the console.log for the MIDIAccess object:

In onMIDISuccess(), a for loop listens for midi messages. Right now it should be causing an error in the console. Why? Because we haven’t defined what to do when it receives a midi message.

Let’s create the onMIDImessage function referenced in the loop:

function onMIDImessage(messageData) {
var newItem = document.createElement('li');
newItem.appendChild(document.createTextNode(messageData.data));
newItem.className = 'user-midi';
document.getElementById('midi-data').prepend(newItem);

This function creates a new <li> element. It appends a text node with our midi data. It adds a css class of user-midi (this will be important later). Finally, it adds that new list item to the unordered list with the id “midi-data”. 

Pretty cool, eh?

But what do these numbers mean? Also: where’s the sound?

MIDI Protocol

MIDI Protocol is a rabbit hole all its own, but for our purposes you can understand the numbers with a simple chart:

On / Off → 144 / 128

Pitch → 0–127

Velocity → 0–127

When working with this data, we’ll treat the first number like an on/off switch. 144 = on, 128 = off. The second number is the range of pitches. The final velocity input could also be understood as volume in our usage here.

If you’d like a more in-depth look at midi, here’s a good place to start.

Sound

The MIDI data is not the sound, but a set of directions: ON/OFF, PITCH, VELOCITY. We’ll need to make our own synth that can turn this information into musical tones.

First, let’s convert those value sets from an array into a ‘note’ object that we can pass to our sound player. In onMIDImessage function, add:

var d = messageData.data; // Example: [144, 60, 100]
var note = {
on: d[0],
pitch: d[1],
velocity: d[2]
}
play(note);

Above, the variable ‘d’ is assigned the incoming data: an array of three numbers. Those three values are accessed by their index and assigned as values for the object properties. The note object is then passed to the play function. Let’s write that function:

function play(note){
switch(note.on) {
case 144:
noteOn(frequency(note.pitch), note.velocity);
break;
case 128:
noteOff(frequency(note.pitch), note.velocity);
break;
}
    function frequency(note) {
return Math.pow(2, ((note - 69) / 12)) * 440;
}
   function noteOn(frequency, velocity) {
var osc = oscillators[frequency] = context.createOscillator();
osc.type = 'sawtooth';
osc.frequency.value = frequency;
osc.connect(context.destination);
osc.start(context.currentTime);
}
   function noteOff(frequency, velocity) {
oscillators[frequency].stop(context.currentTime);
oscillators[frequency].disconnect();
}
}

This function checks to see if the note is on (144) or off (128) and triggers the appropriate command. Both noteOn and noteOff reference two global variables that we established at the top of index.js to handle the starting and stopping of sound.

The frequency function is used to convert the midi note number into a hertz frequency. If you’re curious, you can read more about it here.

Your app should now play like a synth. Huzzah!

Step 3: Adding Socket.io for Collaboration

Now it’s time for the fun stuff: syncing multiple users in a session! Socket.io will help us do that by enabling ‘real-time bidirectional event-based communication.’ That means we can send and receive midi messages as they’re triggered on any browser as they occur. Add Socket.io to the project:

npm install socket.io --save

You’ll also need to add this inside the head of index.html:

<!-- public/index.html -->
<script src="/https://cdnjs.cloudflare.com/ajax/libs/socket.io/2.0.3/socket.io.js"></script>

Note: I’m using version 2.0.3 — be sure your versions of Socket.io match your package.json and html script. You might want this link to the CDN.

For Socket.io to connect users we need to assure that:

1) Users can both send and receive notes

2) The server listens for user input and broadcasts it to other users

User send/receive

First, let’s make sure the user emits a signal every time they play a note. This can be accomplished by opening index.js and adding a single line to the function onMIDImessage. Be sure to add this after the note object has been defined.

// public/index.js (inside onMIDImessage)
socket.emit('midi', note);

We also want to play any external notes that come in from other users. Inside index.js, add the following:

// public/index.js
var socket = io();
socket.on('externalMidi', gotExternalMidiMessage);
function gotExternalMidiMessage(data) {
var newItem = document.createElement('li');
newItem.appendChild(document.createTextNode('Note: ' + data.pitch + ' Velocity: ' + data.velocity));
newItem.className = "external-midi";
document.getElementById('midi-data').prepend(newItem);
 playNote(data);
}

When we receive an ‘externalMidi’ message from the server, it triggers gotExternalMidiMessage. This function should look familiar — in fact, we could refactor this later, but for now we’ll repeat code for clarity. It displays the external note in the view in a manner that’s almost identical to how we treat midi input from our own keyboard. However, we’ve given the <li> a class name ‘external-midi’. This will be important in a moment when we add styles to differentiate between our midi input and that of outside users.

Finally, the note is passed to the player to trigger a sound.

Server

Now let’s make a bridge between users. We want to handle any incoming signals and pass them to any other sessions.

In server.js, require Socket.io and add the function newConnection. This will be triggered when the server gains a new connection.

// server.js
var socket = require('socket.io');
var io = socket(server);
io.sockets.on('connection', newConnection);
function newConnection(socket) {
console.log('new connection from:' + socket.id);
 socket.on('midi', midiMsg);
function midiMsg(data) {
socket.broadcast.emit('externalMidi', data);
}
}

The newConnection console.log will appear in the terminal every time a new connection is made. We also have socket.on listening for messages from any user and then triggering midiMsg, which broadcasts that data to every user except the original user.

With that, we’re all set!

Step 3: Styling

If you’re just interested in seeing your notes differentiated from other players, you can take a shortcut here and simply add these classes to your style.css:

// public/css/sytle.css
.user-midi {
color: green;
}
.external-midi {
color: blue;
}

That’s it! Now you will see your own input in green and any external signal in blue. Feel free to skip to the next step and deploy your app to Heroku!

If you’d like to create a keyboard interface, let’s keep rolling:


Build a keyboard

This keyboard we’ll make builds off of @baileyparker’s CodePen project. We’ll make some design and functionality changes to fit our usage. To start, open up this pen in a separate window:

HTML

The div with the class ‘piano’ houses all of our keys, which are labeled with a variety of selectors. Follow the html structure in the pen and paste the piano div and all its keys into your document (/public/index.html).


CSS

This is a big update for our styles. We’re importing a google font, assigning a background image to the body, and finally giving colors to differentiate between .user-midi (pink) and .external-midi (blue) signals. The ul and li elements have been styled so that they’ll slant back at a pleasing angle.

The keyboard styling takes up the remainder of the CSS. Worth noting here are the ‘active’ classes like ‘.piano-key-natural:active’ or ‘.piano-key-natural-external:active’. These are triggered by the Javascript when a note is played. If it matches the data number, the CSS will activate that key to be pink for your notes and blue for any external input.

When you copy the CSS from the pen into your project’s style sheet (/public/style.css), be sure to follow the notes included inside. Most importantly, you’ll need to update the path to the background.

JS

You’ll do the same thing for the Javascript: cut and paste it into /public/index.js below the code we’ve written. Again, it is important to read and follow the few comments within the code.

This code will manage midi controller connections. But you’ll want to focus in on two functions: onMidiMessage & updateKeyboard. The former handles local input and applies the appropriate class to light up the keys. The latter does the same thing (but with a different class) for external messages.

To get external notes to light up the keyboard, we need to return to the function gotExternalMidiMessage. After we call play(), add the following code:

var msg = { }
msg.data = [];
msg.data.push(data.on);
msg.data.push(data.pitch);
msg.data.push(data.velocity);
updateKeyboard(data);

The keyboard needs a specific kind of object data structure to update, so we create msg and fill it with data from our note. That msg object is passed to updateKeyboard which lights up the keys in blue for that external signal.

You should now see your keys light up pink for your own input! When we connect to Heroku add more users, you’ll see those external midi messages light up in blue!

Step 4: Deploy to Heroku

Instead of walking through each step here, I’ll direct you towards the comprehensive documentation at Heroku. They’ve done a great job reviewing options for deployment:

Deploying with Git | Heroku Dev Center
Git is a powerful decentralized revision control system, and is the means for deploying apps to Heroku.devcenter.heroku.com


Summary

If all went well, you should now have an app that passes signals from one user to the next and plays notes from every user. The keyboard should light up with different colors for your input and that of external sources. 

 I’m excited about this collaborative app. It has been a real thrill hooking it up and inviting friends from other states to log on and play music! Looking back, I also see ways that the data could be passed more efficiently and areas where the design could be enhanced — it’s not friendly to smaller screens, for instance.

I’d love to hear how you’re using the app, and I hope it has given you a better understanding of how to combine Express.js, Socket.io, and the Web MIDI API!

Bluetooth MIDI is here to stay

This is an article that was originally posted on the Cakewalk blog and they kindly gave us permission to excerpt it here on MIDI.org and link to the full article. The cover photo is courtesy of Pete Brown from Microsoft. 

There are dozens of wireless data standards today. So why is Bluetooth so popular?
Wireless standards may be grouped into a few classes:

Optimized for short-range communications (Bluetooth),
Wide area communications (801.11g/n/a, DECT etc, 802.11 over AVB),
Nationwide or global coverage (cellular networks 3G, 4G LTE, etc)
Personal area networks (Bluetooth LE, UWB, etc).

By far the most ubiquitous wireless protocol in use for audio devices is Bluetooth. This is primarily due to low-cost of Bluetooth hardware, ease of use, widespread adoption and availability of devices with built-in Bluetooth support – cars, cellular phones, headphones, speakers, even door locks are equipped with Bluetooth functionality today.

AVB (Audio Video Bridging) is one of the more promising networking technologies for audio due to its high bandwidth capabilities and scalability, and has also generated a lot of buzz in the audio community. Although wired AVB has gained a fair amount of traction with many pro audio interfaces as well as the automotive industry, wireless AVB unfortunately has been slow to develop.

Bluetooth may have gotten a bad rap in the past for error prone device discovery and pairing, high latency and glitchy audio playback. With the adoption of more recent Bluetooth standards such as BT 4.0 and higher, stability has greatly increased and the latency is much improved. With the addition of MIDI data transmission via the Bluetooth LE specification, Bluetooth is now a complete media streaming solution. Bluetooth 5 continues to evolve, adding 4X the range, 2X the speed, and 8X the data broadcasting capacity compared to Bluetooth 4. Longer range powers whole home and building coverage, for more robust and reliable connections.

by Noel Borthwick [Cakewalk]Chief Technology Officer

MIDI APIs

The most widely used MIDI programming interface is the classic MME (Multimedia extensions) API that has been in existence since 1991. DirectMusic was another somewhat lesser-used, higher-level API for MIDI. MME has been in use by DAW applications for decades. While audio support in Windows has progressed a lot from MME via ASIO, WDM, and WASAPI, MIDI support in Windows has seen no updates until recently.

In Windows 10, Microsoft introduced the new UWP MIDI API. The idea was to provide a more modern and extensible way for UWP applications to communicate with MIDI devices and provide support for newer MIDI protocols / interfaces. Since this API was designed for UWP applications, it was not adopted by most DAW vendors who are building Win32 applications.

Recently, in Sept 2016 Microsoft released a UWP wrapper to allow Win32 applications to also use the UWP MIDI API through a translation layer. Cakewalk evaluated this API and found it viable. Details about this announcement and more info about UWP MIDI can be found in this Microsoft blog post.

Advantages of UWP MIDI

  • UWP is the new API platform so any changes to MIDI functionality will be available only via UWP and not the older MIDI APIs
  • Can be used by both UWP apps as well as Win32 apps (using the Win32 wrapper)
  • Supports Bluetooth LE MIDI (BLE-MIDI) protocol
  • Handles multi-client access to MIDI ports
  • Much simpler API to use overall

Bluetooth LE MIDI support

The Windows 10 Anniversary Edition, includes in-box support for Bluetooth LE MIDI (BLE-MIDI) that was developed by an MMA working group. Bluetooth Low Energy (BLE) is a wireless connection specification supported by the majority of mobile computing devices. BLE can extend battery life for mobile devices using connected accessories (such as MIDI keyboards and controllers) that don’t continuously stream data.

Bluetooth MIDI can be used by any application via the Windows 10 UWP MIDI API. As long as the PC has a Bluetooth LE capable radio, no additional hardware is necessary to talk to Bluetooth MIDI peripherals such as keyboards, pedals and controllers. Note that the PC itself can’t be a Bluetooth peripheral as of now, since Microsoft hasn’t implemented that yet.

For the full article by Noel Borthwick, please click on the link below. 


...

Wireless Audio and MIDI in SONAR – The Cakewalk Blog

With the proliferation of Bluetooth enabled devices, IoT (internet of things), wireless technology is one of the hottest trends today with wide-reaching applications to audio, automotive, medical and other industries. Gibson R&D is actively involved with wireless technology both in the hardware and software space and a member of the Bluetooth SIG, responsible for the…

A Web Developer’s Tale of the Octapad Revival

Two months ago, I was tasked with presenting a talk on the Web MIDI API to an amazing crowd of music-loving web developers. Obviously, I wanted the presentation to be exciting, so my first idea was to find a cool MIDI controller that I could use to demo the API with. What kind of controller could fit the bill? What about an old… keytar? Yes, that would be awesome! Nobody’s using those anymore so they will be dirt cheap, right? So I hit eBay and here’s what I found…

An original Yamaha KX-5 carefully laid out on purple velvet. It couldn’t get any more perfect than that, could it? But wait, are they really asking 350$ for it? Plus 130$ for shipping! That’s 500$ US dollars… which means about 630$ in Canadian dollars! Whoaaa, there is no way I’m spending that kind of money on a 45-minute presentation.

What then? Hmmmm.

This is when I remembered the era before I became a web developer when drumming was my whole life. More importantly, I remembered that I already had a cool MIDI controller in my possession: my good old Roland Octapad II. The Octapad is an eight pad percussion controller made by Roland starting in the 80s. How about using that for the demo? That would be cool. But where on Earth did I put this thing? After a few hours of searching, I finally found it hidden in the garage. I plugged it in and it powered up. Oh yeah! I started playing it and then I realized that time had taken its toll. No matter how hard I stroked the pads, the hits barely registered. Damn, this thing is busted. Should I be surprised? After all, this device is at least 25 years old and has been sitting in a damp garage for over 10 years.

But still, it would be so cool to use it for the conference demo. So I started digging around on the Internet to see if this thing could be revived somehow. After an hour or so of reading outdated forum posts and barely-related blog articles, I stumbled upon a post from this guy who said the problem is easy to fix. The piezos are dead he said. Just get new ones and you will be good to go. What have I got to lose, right?

A bit of Googling tells me that piezos are simple vibration-sensitive sensors, precisely the kind you would expect in a percussion controller. Because I had no idea what kind or size of piezos I should buy, I decided to open the unit up. Surprisingly, this was very simple. All it took was a Phillips screwdriver and I was in.

I soon realized that it was a good idea to first check inside. Being an 8-pad controller, I was expecting to buy 8 piezos. However, as you can see on the picture above, 10 piezos are needed. I’m guessing the extra 2 are used to counter any crossover that could happen between the pads through the casing. Furthermore, opening it allowed me to measure the size of the piezos. In the end, I ordered twelve 35mm piezos from Digikey. I bought an extra 2 to be on the safe side.

While getting inside the unit wasn’t hard, getting to the piezos was a little bit harder. As you can see, two of the piezos are hidden under a board which needs to be removed in order to gain access to them. As a matter of fact, the whole unit pretty much needs to be dismantled to be able to extract the old piezos and put in the new ones. If you are attempting this operation, I urge you to do as I did and take pictures all the way through the operation. This way you will know which screws (there are various types and lengths), connectors and daughterboards go where. I’m soooo glad I did!

The dismantling operation wasn’t hard but I was extra careful in the way I handled all the various pieces. I didn’t want to lose anything or forget where something was going. Then, at one point, I realized that the only way to go further was to actually desolder the piezos from the central board strip (a.k.a. Pad-8 Sensor Board). This was the point of no return. As you can see in the picture below, in order to remove the sensor board and get to the pads, you must desolder the piezos, there’s no way around it. So I did. 

Note that all the white wires are connected to the board’s center strip while the black wires have their own strip leading to separate cables on the left side. This makes sense: one common ground for all and separate signal wires for each pads.

Once the sensor board is removed, you can unglue the piezos from the pads. This can be quite scary. Especially when all you are left with is a pile of dead piezos and the conviction that you are never going to be able to put all this back together…

As you can see above, the piezos are affixed to the pads using some sort of double-sided tape. I had no idea which kind of tape was appropriate so I bought Scotch-Brand 3M 1″ Permanent Mounting Squares (cat. 111C). If you use them, you will want to trim the corners of the squares so they fit snuggly inside the center circle of the piezo. The idea is for the outer ring to vibrate freely.

Obviously, you also need to solder the new piezos to the sensor board. The piezos I bought came with short and flimsy wires which I did not trust. So I opted to use sturdier wiring. I had some speaker wires on hand so I used that. Just be sure to make the right connections. The inside ring of all piezos should be connected to the shared central strip on the sensor board while the outer rings of each piezos should be connected to their own individual strip. In the end, my soldering job was a bit messy but I made sure the connections were solid and not touching other conductive strips (this is very important!).

I then put the Octapad back together, plugged it in and crossed my fingers… Guess what? It worked. In fact, it might now be working better than ever before. Nice.

Obviously, I used it during my talk and I had a blast. Attendees also had a great time witnessing how a 25 y/o piece of hardware (brought to this world before the Internet was even invented) could trigger sounds and visuals inside a web page running in Google Chrome.

The moral of the story, I guess, is that well-designed and proven technologies can, and often do, withstand the test of time. They might need a little love along the way but don’t we all?

If you are musician paying the bills doing web development work, I urge you to dust off your old MIDI devices and hook them up to your browser. You will be amazed at what can be done with the Web MIDI API. If you are curious to know how this is possible, check out the library I created that makes it very easy to use the Web MIDI API. You can also take a look at the slides from my presentation.

[Updated] How to Make Your Own 3.5mm mini stereo TRS-to-MIDI 5 pin DIN cables

Editors note:

This article was written before the MMA published an official standard for using TRS adapters with MIDI devices, and simply describes the TRS connectors that exist in the market. Future products should use the MMA Specification if they want to be interoperable. 

In the past few years, MIDI hardware products have become smaller and smaller, especially as many of them are meant to be used with mobile computing devices. But this has caused some issues, as 5 Pin DIN MIDI plugs are pretty big. No one wants an accessory that’s 10 times the size of the smartphone it connects to!

So recently many products have used a stereo 3.5mm minijack connector on the product itself, with a breakout cable to a female 5 Pin DIN MIDI connector. This allows you to plug a regular male to male 5 PIN DIN MIDI cable into the female MIDI breakout connector and the other end can connect to a MIDI Out or MIDI In on a MIDI keyboard or MIDI interface.

3.5 mm mini stereo to 5 pin DIN MIDI breakout cable


How 3.5 mm Tip Ring Sleeve Mini jacks are wired to 5 Pin DIN MIDI connectors 

It turns out that there are at least two different variations of wiring for TRS to MIDI. We will call the main two TRS “Type A” and TRS “Type B” in this article. The first product to use TRS breakout cables was the Line 6 MIDI Mobilizer in 2010. We call the Line 6 method Type A because the MIDI Mobilizer was the first TRS MIDI product on the market.

The number of products in the marketplace is pretty evenly split between Type A and Type B because very popular Arturia and Novation products use Type B wiring. Of course, both wiring methods work, you just need to know which version your product uses, so you can make/buy the right cables or connect to another product via a straight TRS cable. 


TRS To MIDI Male Type A

Akai Pro, IK Multimedia, Korg, Line 6, littleBits, Make Noise 

Pin 5-Tip (Current Sink)
Pin 4- Ring (Current Source)
Pin 2 – Sleeve (Shield)

Here is the wiring diagram for the Line 6 MIDI Mobilizer.

Korg_littleBits-MIDI-Adapter-Diagram


The pin-out for all IK Multimedia products implementing MIDI I/O via 2.5mm

TRS jacks is as follows:

TRS<-> 5pin DIN

——————-

Tip<-> Pin 5

Ring <-> Pin 4

Sleeve <-> Pin 2

MIDI Out (ring / Pin 4) pull-up resistor, connects to a 3.3V power rail. 


TRS to MIDI Type B 

Arturia, Music1010, Novation

Pin 5 – Ring (Current Sink)
Pin 4 – Tip (Current Source)
Pin 2 – Sleeve (Shield)

Revised MIDI/Clock adapter pin out for Beat Step Pro

Introduction

This document describes the breakout cables for BeatStep pro.

There are two such cables:

  • A MIDI one, suitable for both MIDI in and MIDI out plugs of BeatStep pro
  • A Clockone, suitable for both clock in and clock out plugs of BeatStep pro

Both have a 3.5mm male jack at one end and a 5-pin 180° DIN female socket at the other end.

New MIDI adapter wiring for Beat Step Pro

Connections:

  • Jack tip to pin #4
  • Jack ring to pin #5
  • Jack sleeve (earth/ground) to DIN pin #2

There should be no connection whatsoever to neither pin #1 nor pin #3 of DIN socket

Colors:

  • DIN socket: white
  • Wire insulator: white
  • Jack plug: Pantone Cool Grey 3 C (same as the light grey on the front panel)


New Clock adapter wiring for Beat Step Pro

Connections:

Jack tip to pin #3

Jack ring to pin #1

Jack sleeve (earth/ground) to DIN pin #2

There should be no connection whatsoever to neither pin #4 nor pin #5

Colors:

DIN socket: white

Wire insulator: white

Jack plug: Black 


This Youtube video shows you how to make a DIY MIDI cable for the Arturia Beatstep Pro. Notice that the wiring is different than the above Type A as Pin 5 and Pin 4 are flipped. 


The BeatStep pro comes with a variety of cables  and they are all a little bit different. We found a really good article on a blog called Theatre of Noise. 


When you purchase an Arturia Beatstep Pro, you get two white
adapters as pictured below. (A black male MIDI connector is included for
comparison.)

Both of the white adapters have a female MIDI DIN plug, so
it can be coupled with a standard MIDI DIN cable. The other ends are
colour-coded because they are meant for entirely different purposes.

The grey cable is designed for MIDI output. DIN pin 4
connects to the Tip and pin 5 connects to the Ring. (I have confirmed this with
a multimeter.)

This is the standard adopted by Novation, Arturia, and IK
Multimedia. Do not be surprised when I tell you that Korg has done the
opposite! So if you were going out of a 3.5mm MIDI socket on a Korg device, you
would need a different adapter to MIDI DIN-5. It would look the same, but have
different internal connections.

So what the heck is the Arturia adapter with the black 3.5mm
termination? Near as I can tell it’s for sync output. Tip and Sleeve are wired
to pins 1 and 3. This means they don’t conflict with MIDI in any way. This is a
smart solution. Or would be, if you think that repurposing the same cable
adapter a third time is a good idea.

The mind boggles.

by Robin Parmar from Theatre of Noise


The 1010Music MX4

MX4 Buffered MIDI Multiple for Eurorack copies one MIDI signal to four outputs

The MX4 uses TRS minijacks for handy connection directly between the following devices:

All 1010music modules, including MX4, bitbox, and fxbox

The Arturia BeatStep Pro

Novation products, including the Launch Pad Pro

The MX4 includes two MIDI adapters to connect with any equipment using the MIDI standard, 5-pin DIN connector, two TRS cables for MIDI patching and a standard power ribbon cable for connecting to your eurorack.

Products Compatible with the Stereo Minijack Cables

  • 1010music products
  • Arturia BeatStep Pro
  • inMusic (Akai) products
  • Novation products (such as Launchpad Pro)

Products that use an alternative signal mapping for the minijack connections cannot use standard patch cords/stereo minijack cables. Instead, these products can be connected by means of a pair of MIDI adapters. Use the black and white MIDI adapters provided with the MX4 to connect to the MX4 jacks, then use the appropriate MIDI adapter to connect to the external device.

The following products are known to require a MIDI adapter:

Products that Require a MIDI Adapter:

  • Korg products
  • Make Noise 0-Coast
  • Arturia BeatStep (not to be confused with the BeatStep Pro)
  • ADDAC System products

See the Technical Specifications below for more details about the connectors used by 1010music products.

If your device isn’t listed above, how can you tell if the stereo minijack connector on your MIDI device is compatible? Compare the technical specifications below with those provided with the external device, or just try it out. Either it will work or it won’t. Attempting to connect with incompatible cables should not damage devices designed in accordance with the MIDI spec.


by Music1010

The 1010Music Bit Box also supports TRS MIDI

“Bitbox is a 26HP Eurorack module that delivers recording, clip launching, and looping in a musically intelligent way. With a 24-bit audio path, you can capture and play samples with impeccable audio quality. With clock and MIDI inputs, you can create loops pre-cut to bars or beats and launch clips with similar synchronization. Bitbox has a capacitive touch screen that makes easy work of tweaking, browsing, and loading sounds from your microSD card.” 

1010Music 

Keith McMillen combines Leap Motion and Web MIDI

Keith McMillen Instruments shared this short demo of gestural mixing, using their K-Mix programmable mixer, a Leap Motion controller and Web MIDI.

MIDI Gestural control really seems to be taking off recently enabled by wireless BTLE MIDI, improvement in gesture recognition technology and advances in sensors. In this case, KMI is using a Leap Motion controller and Web MIDI to do gestural mixing. 

Leap Motion allows you to get a staggering amount of detail and data from the movement of your hands, fingers, and joints, but in this project, we’re only interested in three things:
1. which hand we’re using
2. what finger we’re using
3. is our hand is closed to a fist

by ANDREJ HRONCO

KMI has a great series of blog articles about Web MIDI.  Here is a summary and links to that series. 


...

K-Mix API, Part 2 – Controlling K-Mix with Leap Motion and the Web MIDI API | Keith McMillen Instruments

If you’ve ever fantasized about mixing with your hands similar to how you control a Theremin or in the movie Minority Report, your dreams are now closer to reality! With the latest K-Mix update, which enables sending MIDI message to fully control K-Mix, combined with the the K-Mix API and the incredible Leap Motion controller, I’ll demonstrate how you can control K-Mix with only your hands and fingers, without touching K-Mix at all!. K-Mix used with the K-Mix API brings a new meaning to the term ‘Programmable Mixer’


...

K-Mix API, Part 1 – Web MIDI Control Surface | Keith McMillen Instruments

One of K-Mix’s most powerful features is its ability to be programmed and controlled from any DAW. With the power of Web MIDI in your browser and the K-Mix API, K-Mix becomes the first audio mixer that’s fully controllable with JavaScript. In Part 1, I’ll go over the basics of using the K-Mix API and using K-Mix as a control surface for a web app.


...

Making Music in the Browser: Web Audio/MIDI – Amplitude Modulation | Keith McMillen Instruments

Amplitude Modulation is a simple concept that can yield harmonically rich and bizarre timbres not easily achieved via other methods. In this article we’ll expand on the topics introduced in Simple Synthesis – Amplitude Modulation and play around with the concepts behind AM Synthesis. Modulation sources do not need to be low-frequency oscillators or envelope generators.


...

Making Music in the Browser: Web Audio/MIDI – Envelope Generator | Keith McMillen Instruments

In our first Simple Synthesis Addendum we learned how to connect a VCO to a VCA and control their ‘frequency’ and ‘gain’ AudioParams using a MIDI controller via the Web MIDI API. Good stuff! We now have a simple synth we can play. In this post we’ll learn how to shape our notes by building a Envelope Generator with configurable attack, decay, sustain and release using the Web Audio API’s scheduling methods. We’ll also give our Envelope Generator a ‘Mode’ setting, which will give us the ability to create some really long envelopes to play with.


...

Making Music in the Browser: Web Audio/MIDI – VCO/VCA | Keith McMillen Instruments

Emmett Corman has a great introductory series on the basics of synthesis (using modular synths), called Simple Synthesis. I thought it would be of value to those without access to the hardware to be able to explore and interact with the concepts that Emmett covers directly in the browser, using the Web MIDI and Web Audio APIs.


...

Making Music in the Browser – Web MIDI API | Keith McMillen Instruments

This opens up a huge variety of possibilities for not only art and music in the browser, but also allows any hardware that uses MIDI as its communication platform to control and be controlled by your browser. MIDI.org itself says “the Web-MIDI API is the most significant advancement of MIDI since… MIDI itself!”


...

Manipulating MIDI with Pure Data | Keith McMillen Instruments

Working in technical support for KMI, I am often confronted with requests for functionality from some of our devices that we didn’t include for one reason or another. There’s a variety of tools that you can use for this task, such as Max, Bome’s MIDI translator or Pure Data. All of these software environments can do wonderful creative things with MIDI information, but one of them has a defining characteristic; Pure Data is free, open-source, cross platform software. This means that you can make a solution by yourself, today, for free, that can run on Mac, Windows, Linux and even on a Raspberry Pi. In this article (and maybe more) we’ll look at the basics of manipulating MIDI in Pure Data to give the SoftStep2 four triggers on each pad.


...

Sequencing the SEM: MIDI to CV Conversion | Keith McMillen Instruments

The best way to unlock the hidden potential of any semi-modular synthesizer is by sequencing. This post will describe the necessary steps to use the QuNexus as a MIDI-to-CV converter along with Ableton Live to control the legendary Oberheim Synthesizer Expander Module.
Before you begin, make sure you have an SEM


...

Interfacing with MIDI Hardware Using M4L: The Meeblip Anode | Keith McMillen Instruments

With the advent of small, portable, MIDI enabled analog synthesizers, computer musicians now have the option of controlling a lot more than VSTs. If you have a USB MIDI interface (or other means of getting MIDI from your computer to 5 Pin MIDI connections), you can leverage the sequencing power of Live to control all of the MIDI enabled parameters on your synth. In this article, we’ll look at how to create a MIDI device using M4L that allows us to access all of the parameters on the Meeblip Anode, as well as how to add modulation sources to allow for more sonic options.

Serial, Parallel, and Joystick Ports

Serial, Parallel, and Joystick Ports

Before USB and FireWire, personal computers were all generally equipped with serial, parallel, and (possibly) joystick ports, all of which have been used for connecting MIDI-equipped instruments (through special adapters). Though not always faster than MIDI-DIN, these connectors were already available on computers and that made them an economical alternative to add-on cards, with the added benefit that in general they already worked and did not need special configuration. The High Speed Serial Ports such as the “mini-DIN” ports available on early Macintosh computers support communication speeds roughly 20 times faster than MIDI-DIN, making it also possible for companies to develop and market “multiport” MIDI interfaces that allowed connecting multiple MIDI-DINs to one computer. In this manner it became possible to have the computer address many different MIDI-equipped devices at the same time. Recent multi-port MIDI interfaces use even faster USB or FireWire ports to connect to the computer.

Basics of USB-MIDI

USB MIDI 2.0 ADOPTED

MIDI 2.0 Progress Continues with Updated USB Specification –  

As computers have become central components in many MIDI systems, USB has become the most widely used protocol for transporting MIDI data. With the introduction of MIDI 2.0, the USB Implementers Forum’s USB MIDI 2.0 working group, headed by members o


USB and MIDI


MIDI has stayed relevant for over 30 years by adapting to the different ways that computers send information to and from external devices. MIDI can now be sent over 5 Pin DIN, Serial Ports, USB, Firewire, Ethernet, Bluetooth and more. But currently the most prevalent way to connect to computers, tablets and smartphones is USB. This article will cover the basics of USB-MIDI.


Why USB came about


In the early 1990’s, there were far too many types of connectors on computers. There were separate serial ports, parallel ports, keyboard and mouse connections, and joystick ports, It was hard for people to tell whether the peripheral they were buying would actually work with their computer.  So Compaq, Intel, Microsoft and NEC ( joined later by Hewlett-Packard, Lucent and Philips) formed the USB Implementers Forum, Inc, a non-profit corporation to publish the specifications and organise further development in USB. Similar to the MIDI Manufacturers Association, the USB-IF makes sure that there is interoperability between USB devices.


Goals of USB


The USB-IF had some clear goals when first developing the USB specification

  • Standardize connector types: There are now several different types of USB connectors, but they are all standardized by the USB-IF
  • Hot-swappable: USB devices can be safely plugged and unplugged as needed while the computer is running. So there is no need to reboot.
  • Plug and Play: USB devices are divided into functional types (Audio, Image, Human User Interface, Mass Storage) and then operating system software can automatically identify, configure, and load the appropriate device driver when a user connects a USB device.
  • High performance: USB offers low speed (1.5 Mbit/s), full speed (12 Mbit/s) and high speed (up to 480 Mbit/s) transfer rates that can support a variety of USB peripherals. USB 3.0 (SuperSpeed USB) achieves the throughput up to 5.0 Gbit/s.
  • Expandability: Up to 127 different peripheral devices may theoretically be connected to a single bus at one time


USB System Architecture


The basic USB system architecture is actually pretty simple and consists of the following main components:

  • A Host Computer, Smartphone or Tablet
  • One or more USB Devices
  • A physical bus represented by the USB Cable that links the devices with the host 

The Universal Serial Bus is a host controlled bus. All data transfers are initiated and controlled by the host and USB peripherals are slaves responding to host commands. So for  USB MIDI peripheral devices you need a computer, smartphone or tablet in the system to control and initiate USB communication.


USB Device Classes


USB devices are defined into specific functional classes, for example image, human interface devices (keyboard, mouse, joystick), mass storage, and audio. The operating system can then know what the devices is designed to do and automatically load what is called a class compliant driver for that type of devices. In 1999, the MIDI specification was developed by the USB-IF in cooperation with the MIDI Manufacturers Association and included in the Audio class of devices.  That is why sometimes when you connect a USB-MIDI peripheral, the OS will display a message that says USB-Audio devices connected.  As far as USB is concerned MIDI is an Audio Class Compliant device.


Class Compliant Drivers versus Manufacturer Specific Drivers


Class compliant drivers are convenient because you don’t have to download any external software.  But often manufacturer specific drivers provide added functionality. Let’s use Yamaha has an example.  Because data transfer on USb is much faster than 5 pin DIN it is possible to have multiple ports of MIDI (a port is a group of 16 MIDI channels) on a single USB cable. The dedicated Yamaha USB Driver provides for 8 ports of high speed USB, includes the names of all the devices that are compatible with the driver and has some routing capabilities. These features are only available if you download the driver from Yamaha’s website.  Also many audio interfaces are also MIDI interfaces and audio and MIDI travel over the USb cable.  So if you purchase a MIDI or Audio interface you should always check the product manual and manufacturer’s website to see if there is a dedicated USB driver for your product that provides added functionality. Often even if the manufacturer specific driver is available when connected to a device which don’t allow driver downloads into the operating system (for example iOS devices), the product will still work as a class compliant USB device.


Types of USB MIDI connectors


Over the years, USB has developed and there are now a number of different cable types and USB specifications. Let’s take a look at the different connectors.


Originally most desktop and laptops computers had the standard sized Type A USB connector. A standard USB cable has a Type A connector on one end to connect to the host and a Type B connector on the other end to connect to the peripheral device. This is still the most common cable to connect a MIDI instrument to a computer.


USB Type A host connector


Type B USB peripheral connector


The Type A connector has a pin that supplies power to external peripherals so you need to be carefully about trying to connect two hosts via a Type A to Type A cable. This can cause serious damage to your gear so consult the manufacturer and manual before attempting this.


The Type A connector is for host controllers (computers, smartphones, tablets and some digital musical instruments that act as hosts) and USB hubs. A USB hub is a device that expands a single (USB) port into several so that there are more ports available to connect devices to a host system.USB hubs are often built into equipment such as computers, computer keyboards, monitors, or printers. When a device has many USB ports, they all usually stem from one or two internal USB hubs rather than each port having independent USB circuitry. If you need more USB ports, there are also external hubs that you can buy. You need to check to see if your USB peripherals need to be powered by USB and if they do you may need a powered USB hub.


On many digital musical instruments you find two USB connectors – one Type A connector labeled To Device and one Type B labeled To Host .  The To Host is usually used to send MIDI, Audio or both Audio and MIDI to a computer, smartphone or tablet. If your digital music product sends both MIDI and Audio over USB, you will almost certainly need a manufacturer specific driver.

The To Device is usually used for USB Storage devices like Flash Thumb drives, but it can be used for other things depending on what the Host music product supports for device classes.


USB A-Type


Considered the standard and most common type of connector, A-style connectors are found on the PC or charger side of most cables. This flat, rectangular interface is held in place through friction. Durable enough for continuous connection but easy enough for users to connect and disconnect, this connector type is also available in micro variations.


USB B-Type


Type-B USBs were traditionally used with printer cables but, they’re now found on many popular models of Android smartphones and external hard drives. These USBs feature a square interface and are available as a Micro-USB B, USB Mini-b (5-pin), and USB Mini-b (4-pin).


USB C-Type


The newest type of connector on the market, Type-C is a one-size-fits-all solution. Developed to support devices with a smaller, thinner and lighter form factor. Type-C is slim enough for a smartphone or tablet, yet robust enough for a desktop computer. It also has the advantage of a reversible plug orientation and cable direction, eliminating the guesswork about which direction the connection goes.


The future of USB Connectivity


USB Type-C is designed as a one-size-fits-all solution for data transfer and power supply on any device. Featuring a smaller connector, Type-C fits into one multi-use port to simultaneously charge devices and transfer data and also offers backward compatibility to support previous USB standards (2.0, 3.0, and 3.1).

Type-C is quickly becoming the new standard for operating systems and hardware providers; Intel’s Thunderbolt recently switched to USB Type-C ports while enabling cross compatibility with USB 3.1. The new Apple MacBooks feature a Type-C port.

The USB-IF predicts that by 2019, all laptops, tablets, mobile phones, and other consumer electronics will be equipped with USB Type-C.

In the meantime, if you have a newer computer, you may need an adapter to connect your MIDI gear to your computer.


RTP-MIDI or MIDI over Networks

RTP-MIDI (IETF RFC 6295) is a specification for sending/receiving standard “MIDI 1.0” messages using standard networking protocols (“Real Time Protocol” and “Internet Protocol”). RTP-MIDI includes a data recovery mechanism (MIDI event journaling) to address packet loss that can occur on networks, eliminating the need for packet retransmission (which would increase latency and reduce throughput). A thorough description may be found here:

As an IETF standard, RTP-MIDI is not proprietary technology exclusive to any specific company, and is intended for use by anyone without obtaining a license or paying any royalties.

How do I use RTP-MIDI?

RTP-MIDI allows a standard network (wired or wireless) connection to be used for carrying MIDI data.

On Mac OSX and iOS, Apple’s CoreMIDI technology automatically handles the transfer of MIDI data between software apps (sequencers, softsynths, etc.) and external MIDI devices connected via USB (USB-MIDI), FireWire (1394-MIDI) and on a network (RTP-MIDI):

RTP-MIDI support for the Windows (desktop) MIDI API is available from Tobias Erichsen. Erichsen’s implementation is compatible with Apple’s:

Windows RT (the OS used on Windows tablets) does not yet have a MIDI API (it is still in development as of December 2013) but there is code available for developing apps that support RTP-MIDI:

RTP-MIDI can also easily be implemented in hardware such as keyboards, mixers, break-out boxes, etc., since the required memory footprint, processor usage, and hardware requirements are compatible with modern low-cost microcontrollers.

Is RTP-MIDI a replacement for MIDI 1.0 protocol?

RTP-MIDI uses and does not replace MIDI Protocol. RTP-MIDI allows the transport of MIDI 1.0 messages using standard networking hardware (as well as over the Internet), and is an alternative to MIDI DIN, USB-MIDI, and other transports which also use but do not replace MIDI protocol.

Compared to other transports for MIDI 1.0 messages, RTP-MIDI is especially useful for applications where MIDI devices are separated by long distances (for example in a studio, a live event, or a themepark) and anywhere that modern networking technologies are typically used.


...

RTP-MIDI – Wikipedia

RTP-MIDI is a protocol to transport MIDI messages within RTP (Real-time Protocol) packets over Ethernet and WiFi networks.


...

MIDI over Ethernet – Marvellous RTP-MIDI — iConnectivity

iConnectivity Ethernet-equipped MIDI interfaces use a system called RTP-MIDI (Real Time Protocol MIDI). This is a method of running MIDI over standard networks, like Ethernet or even Wi-fi! Yes, that’s right, you can even run MIDI over Wi-Fi!

rtpMIDI | Tobias Erichsen

The rtpMIDI-driver is a virtual MIDI-driver which allows DAW-applications to communicate via network with other computers.

About Web MIDI

The Web MIDI API connects your MIDI gear directly to your browser. 
Your browser connects you to the rest of the world.

MIDI hardware support has been available for a long time in Windows, Mac OS, iOS and most computer/tablet/smart phone platforms through USB, WiFi and even Bluetooth interfaces. But until now, there has been no standard mechanism to use MIDI devices with a Web browser or browser-based Operating System.

The Web Audio Working Group of the W3C has designed the Web MIDI API to provide support for MIDI devices as a standard feature in Web browsers and operating systems across multiple hardware platforms.

Google has led the way to support the inclusion of MIDI in the Web platform, both contributing to the specification and by shipping the first implementation of the Web MIDI API (in Chrome v.43 for Windows, OSX, and Linux), continuing to demonstrate the company’s interest in helping musicians interact with music more easily using the Web.

Being able to connect to local MIDI hardware will increase the creation and distribution of music-making applications for PCs, tablets and smart phones. It also means that popular MIDI hardware can be used to control any kind of software in the browser (using physical buttons and knobs instead of on-screen sliders, for example).

For hardware device makers, instrument control panels and editor/librarians which previously needed to be produced in multiple versions can now be implemented once in HTML5, and consumers can run them on any Web device (tablet, computer, or smart phone) and even “live” over the Web.

And finally, since the browser is connected to the Internet, musicians can more easily share data and even connect music devices over a network. 

Where will Web MIDI take us?

Web MIDI has the potential to be one of the most disruptive music technologies in a long time, maybe as disruptive as MIDI was originally back in 1983. Did Dave Smith and Ikutaro Kakehachi envision a world with 2,6 billion MIDI enabled smart phones. Definitely not! 

Here is an interesting video of someone using a commercially available MIDI controller to play a browser based game. it just makes you think about all the possibilities in the future.

Here are some links to more Web MIDI resources.


...

BandLab: Music Starts Here

Develop your songs from inspiration to finished projects with our best-in-class Mix Editor. Pull from thousands of available beats and loops in our extensive library or connect an interface and record live audio.


...

Soundation — Make music online

Make music in your browser and collaborate with anyone on Soundation, a one-stop shop for audio samples, instruments, and effects.


...

Soundtrap Press – Images & Videos

Soundtrap is the first cloud-based audio recording platform to work across all operating systems, enabling users to co-create music anywhere in the world. The company is headquartered in Stockholm, Sweden. Soundtrap provides an easy-to-use music and audio creation platform for all levels of musical interest and abilities and is being used by the K-12 through higher-education markets. On December 2017, Soundtrap was acquired by Spotify. For more information, visit http://www.soundtrap.com

Soundmondo

Social Sound Sharing with Web MIDI for Yamaha Synths


...

Noteflight – Online Music Notation Software

Noteflight® is an online music writing application that lets you create, view, print and hear music notation with professional quality, right in your web browser.


...

Online piano lessons – Learn piano your way

Learn to play piano with online, interactive lessons and tutorials. Our in-depth courses will adapt and give you feedback. Play your first melody in minutes.


...

Play Drums Online – online rhythm game

Play drums online is an online rhythm game where you can learn to play along with the best songs. Set a new high score or practice your drum skills with your favorite artists and songs.


...

WebSynths : the browser-based microtonal midi instrument

websynths.com is a FREE, browser-based musical instrument, optimized for microtonal experimentation on multi-touch devices.

Here are some Web MIDI links for developers


...

Web MIDI API


Ryoya Kawai’s web music developers appsot site with information in Japanese, English and Chinese.


...

Web MIDI: Music and Show Control in the Browser – TangibleJS

Chrome 43 officially introduces an amazing new feature: MIDI in the browser! For fans of physical computing, this is big news. Take advantage of it!


...

Keith McMillen combines Leap Motion and Web MIDI –

Keith McMillen Instruments shared this short demo of gestural mixing, using their K-Mix programmable mixer, a Leap Motion controller and Web MIDI. This article has links to all the great Web MIDI articles on the KMI site. 

Google Web Audio/MIDI Hackathon at Music China 2015

A special Web Audio/MIDI Hackathon was organized for web developers by Google at the Google Shanghai office. More than 70 developers from across China, from as far as Beijing and Zhangjiakou in northern China, and even a developer from the Netherlands, came to attend the event, which was lead by Ryoya Kawai and Encai Liu of Yamaha, to train the developers about Web Audio and Web MIDI APIs. Bill Luan from Google’s Developer Relations team provided developers with MIDI devices to use (courtesy of Google, Yamaha, Korg, and CME). At the Hackathon, Mr. Kawai and Mr. Liu answered many questions from developers. Some of the developers attending the event demonstrated existing applications, from music-making to art installations, all using MIDI and audio technologies, to inspire others for the development. Attendees were eager to get their application completed for the contest, which will be judged by music and web industry experts from Yamaha, MMA, and Google.