How I Made The MIDICard

I’m Alana Balagot, maker of The MIDICard.
I’ve always been excited about music and technology. My piano teacher set up a simple MIDI studio in the 90’s, with a Dell computer, MIDI keyboard, and a KORG Audio Gallery GM Sound Module, which at the time was many times better than the soft synth sounds coming from Windows’ MIDI playback. We used software like TRAX and Midisoft Studio, and the MIDI demo songs were incredible and inspiring. I was amazed at how much potential there was to create music on the computer, with 64 tracks playing together at once. That’s when I first got into MIDI, learning how note on/off, velocity, and controller signals could control the expression of my music.
I would later continue my passion of music and technology to learn about DAWs and software instruments, and study Composition and Technology in Music and Related Arts at Oberlin Conservatory, and then Music for the Screen at Columbia College Chicago. As an adult, I would continue to follow those interests in music and tech working as a software engineer, film composer, conductor, inventor, creative technologist, and artist.
In 2020, my friend Federico Tobon and I created a musical robotic sculpture, Four Muses, using a repurposed Rock Band keyboard with MIDI out to control four electromechanical musical sculptures to create a robotic band. That’s when I started to learn MIDI at a lower level, reading the MIDI note from the keyboard from an Arduino, packaging that up into a message and sending that with an NRF24L01 transmitter, reading that note with another NRF24L01 receiver, and then triggering a corresponding solenoid or motor to strike an instrument wirelessly. One of the instruments used motors spinning at different frequencies to translate to pitch instead. Using Arduino I also programmed several modes for the keyboard and LED matrix, such as a live interaction mode, a playback mode, a sequencer mode, and a teaching mode.
I travel a lot, and am often writing music on the road. I had a Yamaha QY70 in the 2000’s which I used to love tracking songs on. But I’ve always wanted a tiny MIDI keyboard for my laptop. Even portable keyboards like the Korg nanoKEY were too big for me to use with a laptop on a plane, and took up too much space in my luggage. I also wanted something super portable that I could run warmups on with my chorus, the Trans Chorus of Los Angeles, before gigs.
I started tinkering with the SeeedStudio Xiao, a tiny, quarter-sized microcontroller that is cheap and extremely powerful, arduino compatible, and able to handle HID (Human interface Device) emulation as well as MIDI over USB. I made a breadboard prototype based on my learnings from Four Muses, adding some simple Arduino logic for supporting octave functions (simply add or remove multiples of 12 to the current note), sustain (send a control change) and modulation (another control change). I open-sourced my code here:
https://github.com/alana314/MidiCard
In a manufacturer’s components website, I sorted through hundreds of buttons and switches for days, sorting them by size and by newton force to find the smallest and lightest tiny buttons.
I decided to make a credit-card sized daughterboard for the Xiao that would have 18 keys on it, octave buttons, sustain, and modulation functions. Since the buttons weren’t touch sensitive, I added more buttons for setting global velocity levels (P/MF/FF). I also learned how to multiplex inputs and outputs into rows and columns, giving me 25 inputs from 5 rows and 5 columns using only 10 I/O pins, and diodes to filter out ghost notes. I learned how to use EasyEDA (free PCB Design software), built my first schematic and PCB design, and ordered my first PCBs.
The first batch I got back was a failure. It turns out the diodes I picked had too big of a forward voltage drop, killing my signal flow. ChatGPT was very useful for this, helping me troubleshoot what I’d done wrong, and helping me understand datasheets better to pick the right type of diodes.
I ordered a second batch, and they worked! I had the manufacturer assemble the boards, and then I manually hand-soldered the Xiao microcontrollers onto them, and programmed them in Arduino. I now had a tiny, USB-C MIDI keyboard that I could take anywhere with me, and since it was class compliant, it would work with phones and tablets too.
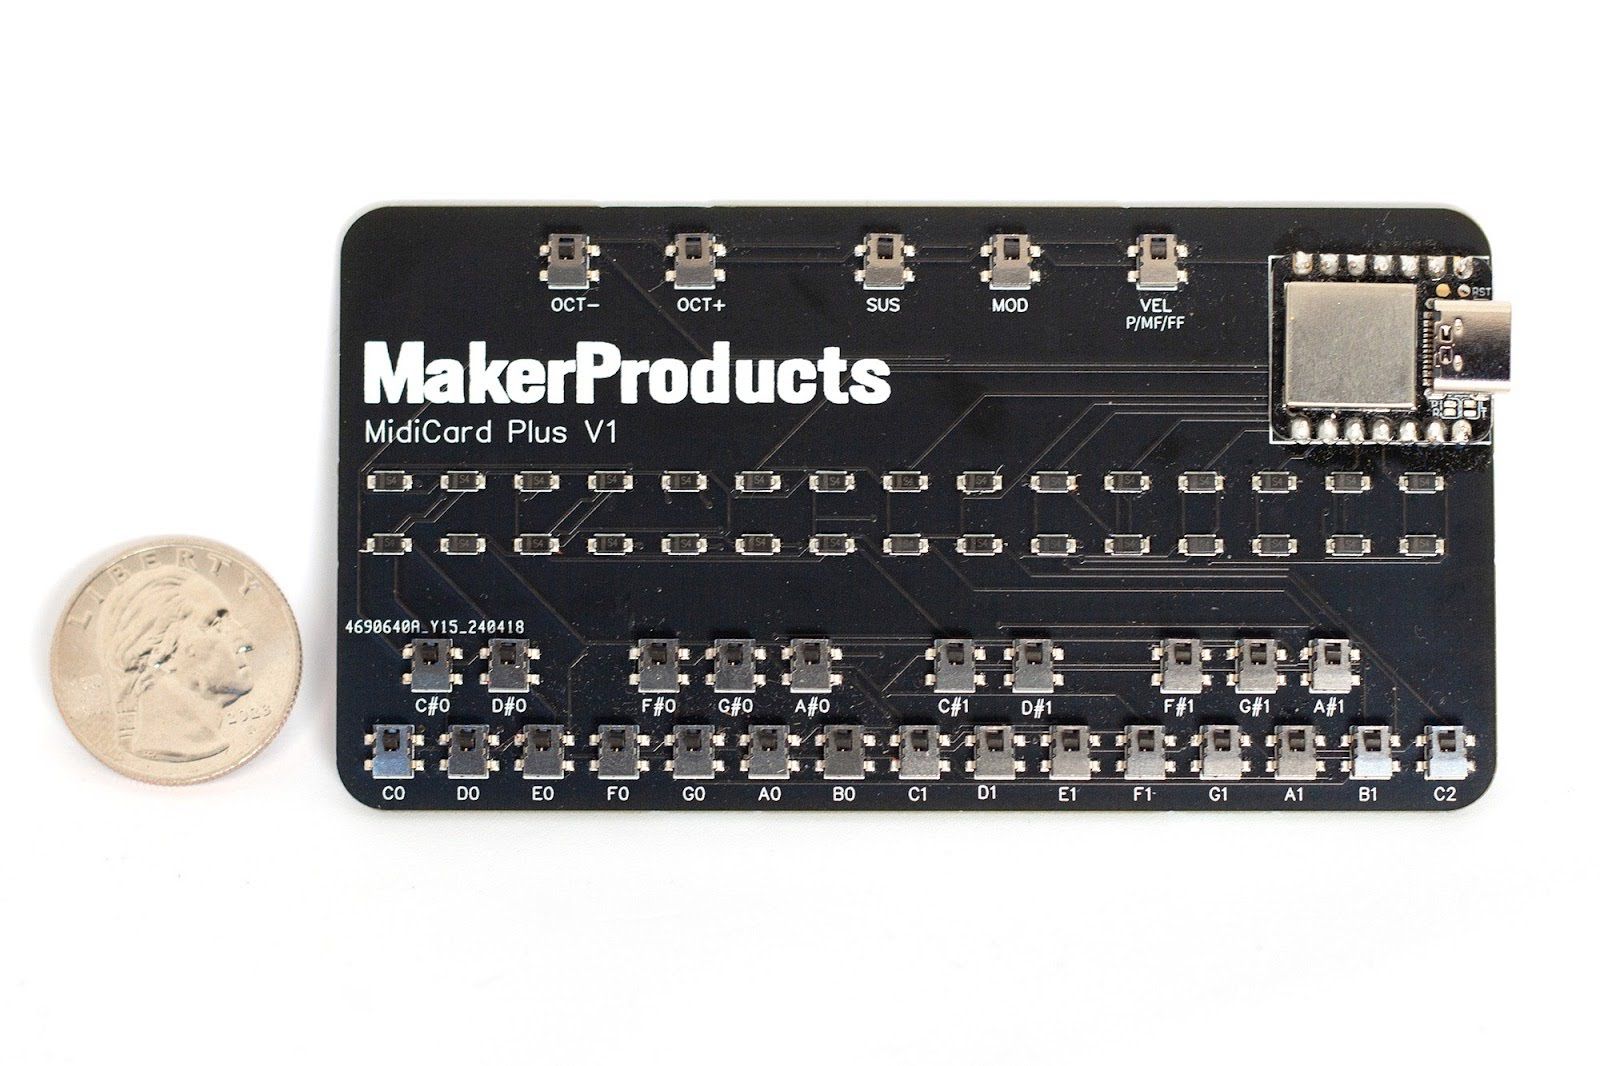
I started selling them online, and there’s been a lot of enthusiasm for these little boards. I’ve continued to iterate with them too. The next version I designed, the MidiCard Plus, has 25 keys, which I could do by combining the 3 velocity buttons into one button with a toggle function to toggle between P/MF/FF. It also has larger, sturdier buttons.
I’m working on future versions of the MidiCard as well with multiple color options, and just using a bare SAM D21 chip instead of the full Xiao module. This will prevent me from having to hand-solder each board and will give them a slimmer profile. I’m also designing cases for the MidiCard, and am open to other suggestions. (Maybe wireless or MIDI 2.0 features!)
If you’re interested in purchasing a MidiCard, they can be found at:
MidiCard Plus: https://makerproducts.art/product/midicard-plus-25-key-small-midi-piano-keyboard-controller/
A demo of the MidiCard can be found here:
This article was contributed by Alana Balagot, maker of The MIDI Card
Contact: makerproductsstore@gmail.com