Telemidi – Creating music over The Internet in real-time
What is Telemidi?
A system of connecting two DAW environments over the internet, to achieve real-time musical `jamming’.
The product of Masters research by Matt Bray.

“…a musician’s behaviour at one location will be occurring at the other location in a near synchronous manner, and vice versa, thus allowing for a `jam’ like atmosphere to be mutually shared.”
Matt Bray (Telemidi creator)
Telemidi is an approach to Networked Music Performance (NMP) that enables musicians to co-create music in real-time by simultaneously exchanging MIDI data over The Internet. Computer networking brings with it the factor of latency (a delay of data transfer), the prevalent obstacle within NMP‘s, especially when attempting to match the interaction of traditional performance ensembles. Telemidi accommodates for latency via the use of numerous Latency Accepting Solutions (LAS – identified below) embedded within two linked DAW environments, to equip performers with the ability to interact in a dynamic, interactive and ongoing musical process (jamming). This is achieved in part by employing RTP (Real Time Protocol) MIDI data transfer systems to deliver performance and control information over The Internet from one IP address to another in a direct P2P (peer to peer) fashion. Once arriving at a given IP address, MIDI data is then routed into the complex DAW environment to control any number of devices, surfaces, commands and performance mechanisms. Essentially, a musician’s behaviour at one location will be occurring at the other location in a near synchronous manner, and vice versa, thus allowing for a `jam’ like atmosphere to be mutually shared. As seen in the video listed below, this infrastructure can be applied to generate all manner of musical actions and genres, whereby participants readily build and exchange musical ideas to support improvising and composing (`Comprovising’). Telemidi is a true Telematic performance system.
What is Telematic Performance?

Telematic music performance is a branch of Network Music Performance (NMP) and is a rapidly evolving, exciting field that brings multiple musicians and technologies into the same virtual space. Telematic Performance is the transfer of data and performance information over significant distances, achieved by the explicit use of technology. The more effective the transfer the greater the sense of Telepresence, the ability of a performer to “be” in the space of another performer. Telematic performances first appeared when Wide Area Networking (WAN) options presented themselves for networked music ensembles via technologies such ISDN telephony, and options increased alongside the explosion of computer processing and networking developments that gave rise to The Internet. Unfortunately in this global WAN environment, latency has stubbornly remained as a constant and seemingly unavoidable obstruction to real-time ensemble performance.

Telematic performance has been thoroughly explored by countless academic, commercial and hobby entities over the last four decades with limited successes. The musical performances have taken many forms throughout the exponential development of computing technologies, yet have been more-or-less restricted by latency at every turn. For example, there is the inherent latency of a CPU within any given DAW, the additional processing loads of soft/hardware devices, the size and number of data packages generated in a performance, and the delivery of this data over The Internet which in turn presents issues regarding available bandwidth, data queuing, WiFi strength etc.. This is but one side of the engagement as we also have the DAW requirements of the reciprocating location, and of course the need for synchronous interplay between the two. Real-time NMPs suffer at the whim of network jitter, data delays and DAW operations.
How Telemidi Works
Telemidi works by exchanging MIDI data in a duplex fashion between the IP addresses of two performers, each of whom are running near-identical soft/hardware DAW environments. A dovetailed MIDI channel allocation caters for their respective actions while avoiding feedback loops, in a system with the potential to deliver performance information to and from each location in near real-time (10-30ms).
To achieve this musical performance over The Internet, the Telemidi process employed:
1 – Hardware – a combination of control devices
2 – Software – two near-identical Ableton Live sets
3 – Latency Accepting Solutions (LAS) – ten examples
4 – RTP MIDI – facilitating the delivery of MIDI data to a WAN.
Click on the tabs below for a summary of items used at each node location during the research stage of the Telemidi research (for more information and to download the Masters thesis go to www.telemidi.org):
Below is a list of hardware used at each location in the Telemidi research:
Lap-top Computers: + Mac and Windows computers used, demonstrating Telemidi accessibility.
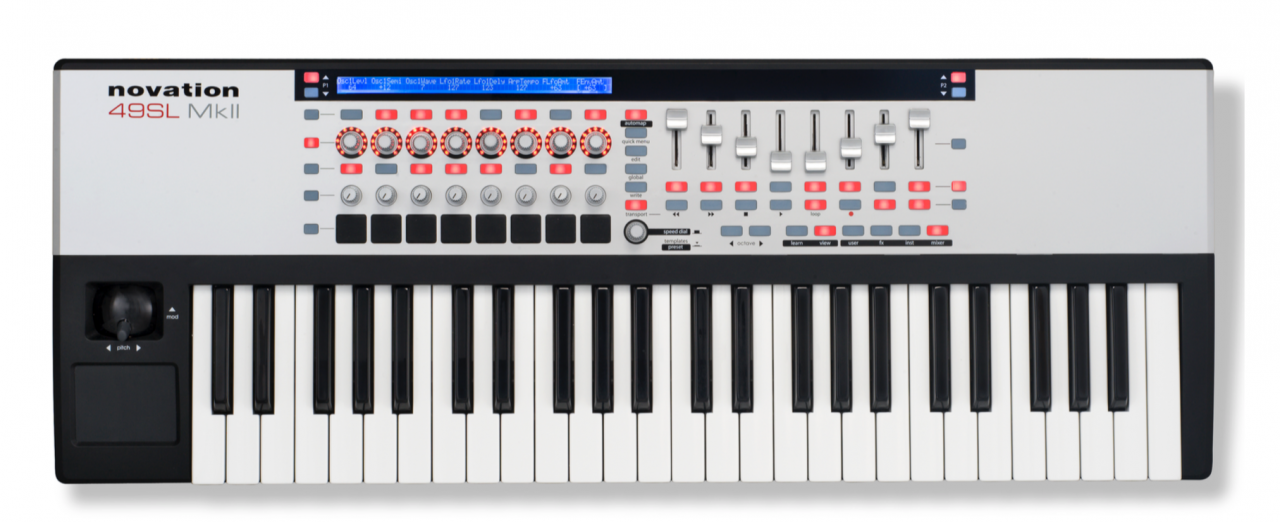
Novation SL Mk II MIDI controller keyboard
+ High capacity for customised MIDI routing (both control and performance data)
+ Traditional musical interface (keyboard)
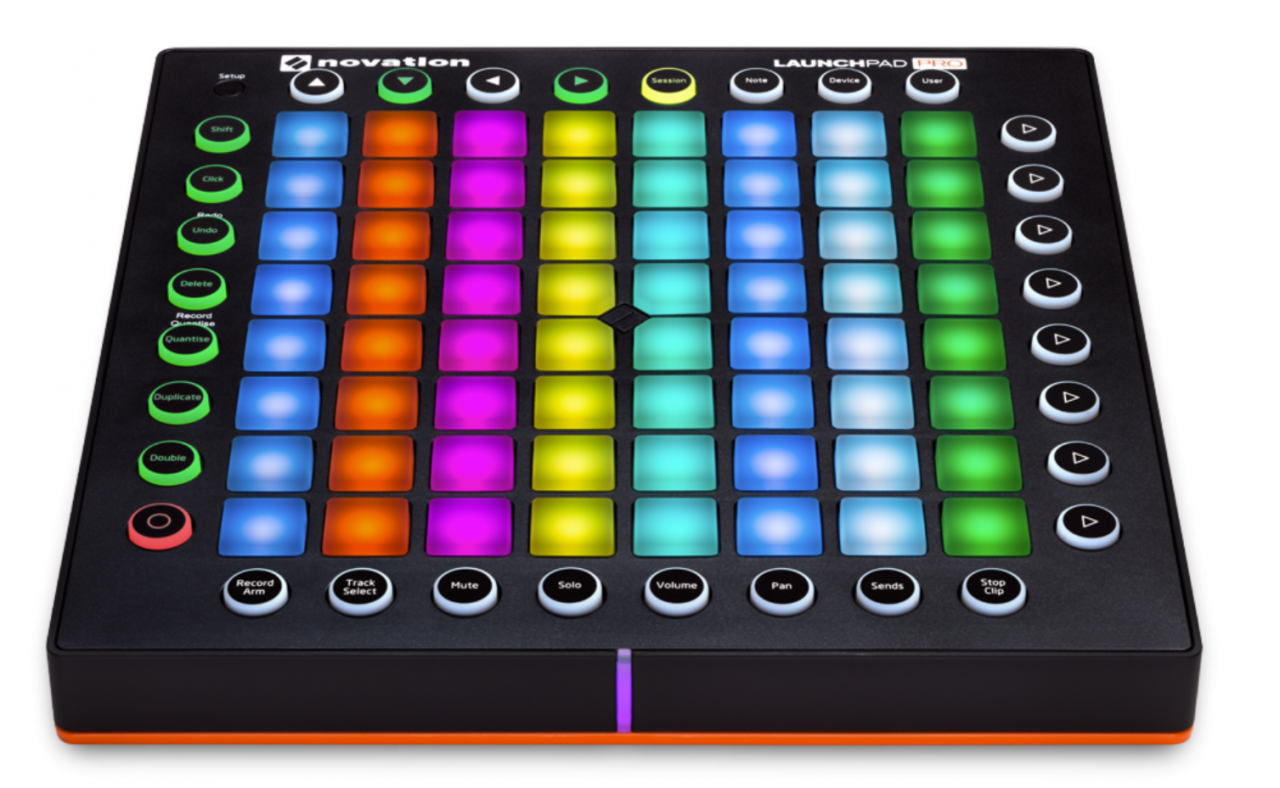
Novation LaunchPad Pro
+ Native integration with Ableton Live
+ Contemporary `Grid-based’ composition process
Software
LAS


Ableton Live
Near-identical Live sets (duplex architecture)
7 pre-composed songs (each split into four sections, A, B, C & D)
54 additional percussion loop patterns
12 x Synth Instruments (Native and 3rdparty)
Synths: 4 each of Bass/Harmony/Lead
16 DSP effects processers (with 2 or more mapped parameters)
286 interleaved MIDI mappings within each Live set
13 of 16 MIDI Channels used for shared performance and control data
Tempo variation control
Volume & start/stop control for each voice (Bass, Harmony & Melody)
Record and Loop capacity for each voice (Bass, Harmony & Melody)
LATENCY ACCEPTING SOLUTIONS (LAS):
The following processes adapt to and overcoming (cumulatively) the obstacle of latency. They are ranked in order of efficiency from 1 (most efficient) to 10 (least efficient).
| LATENCY ACCEPTING SOLUTION | JUSTIFICATION |
| 1 – One Bar Quantisation | All pre-composed, percussive and recorded loops are set to trigger upon a one bar quantization routine, allowing time (2000ms @ 120bpm) to accommodate for network latency between song structure changes (most commonly occurring on a 4 to 8 bar basis). |
| 2 – P2P (Peer ) Network Connection: | Direct delivery of MIDI data from one IP address to the other. A simple direct delivery. No third party `browser-based’ servers used to calibrate message timing. |
| 3 – Master Slave Relationship: | One node (Alpha) was allocated the role of Master and the other (Beta) the role of slave, allowing for consistent, shared tempo and a self-correcting tempo alignment following any network interference. |
| 4 – Pulse-based music (EDM) as chosen genre for performance: | A genre without reliance on a strict scored format, rather a simple and repetitive pulse. |
| 5 – Floating Progression (manner of Comprovising ideas) | Each performer initiates an idea or motif, the other responds accordingly and vice-versa (jamming), any artefacts of latency only play into this process. |
| 6 – 16thNote Record Quantize | Inbuilt Ableton function ensuring any recorded notes quantized to the grid. |
| 7 – MIDI Quantize | 3rdparty Max4Live device (16th note) puts incoming WAN MIDI onto the grid of the receiving DAW. |
| 8 – Manual Incremental Tempo Decrease | In the event of critical latency interference, tempo can be reduced incrementally, thus extending the time between each new bar and granting time for the clearance of latency issues. |
| 9 – Kick drum (bar length loops) | During a period of critical latency interference, a single bar loop of ¼ note kick drum events is triggered to maintain the “genre”. |
| 10 – Stop Buttons | During any period of critical latency interference, each voice (beats, percussion, bass, harmony or melody) can be stopped individually to reduce the musical texture, or to stop harmonic dissonance and stuck notes. |
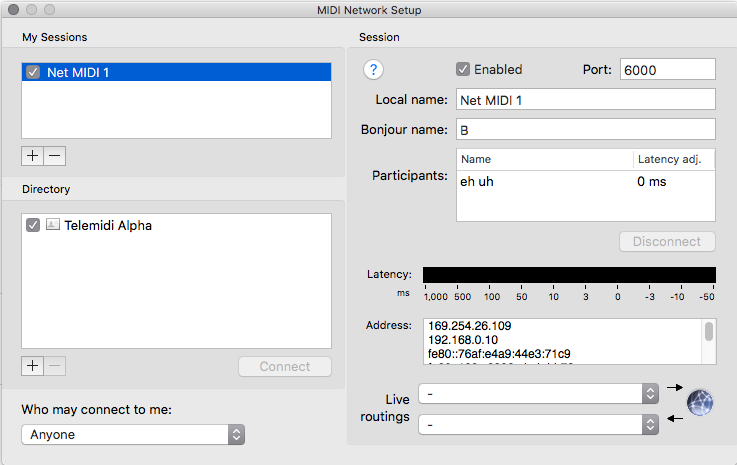
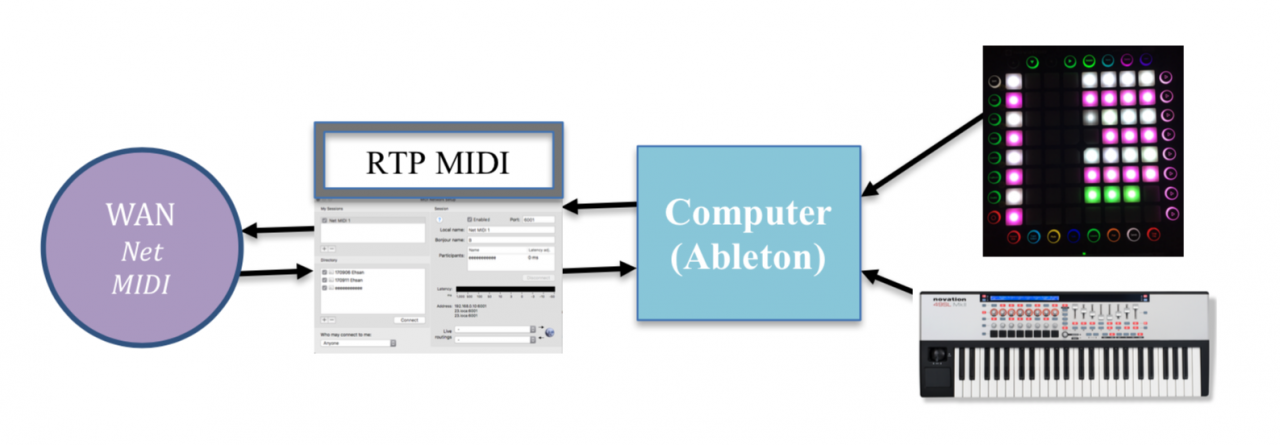
RTP MIDI
+ MacOS – AppleMIDI accessed through `Audio MIDI Setup’
+ Windows – rtpMIDI software used (created by Tobias Erichsen)
Success of Performance
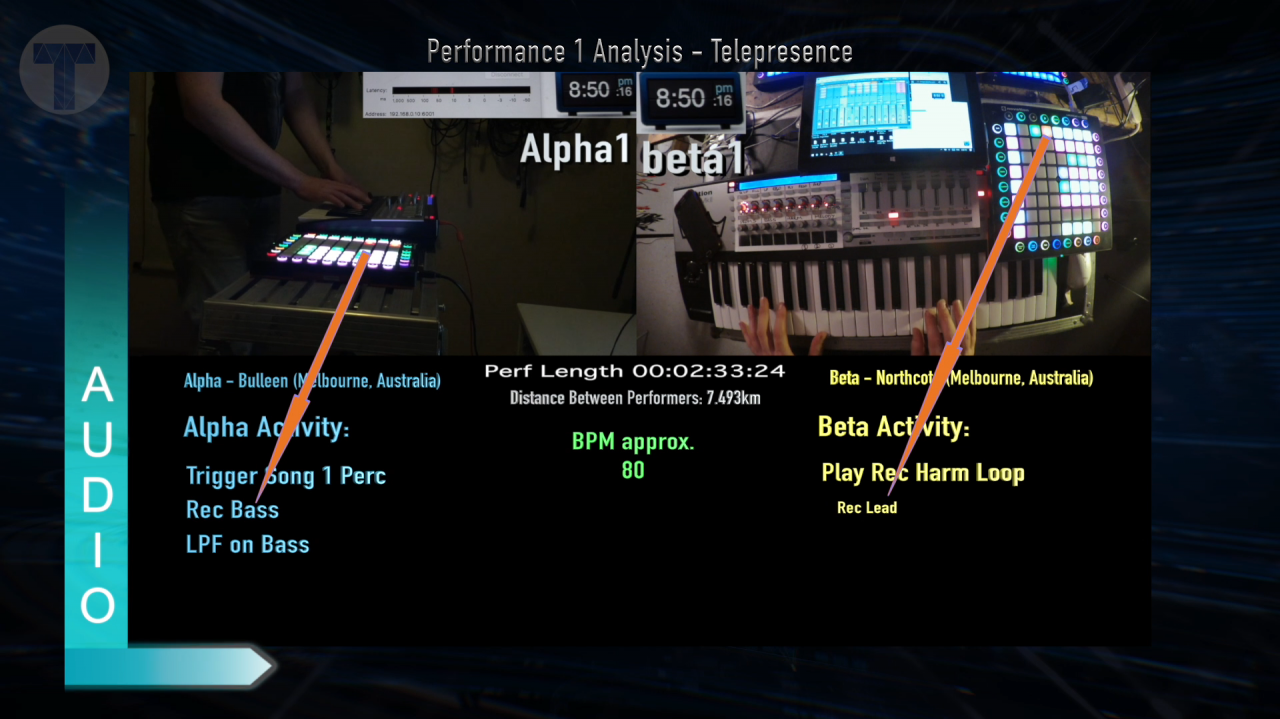
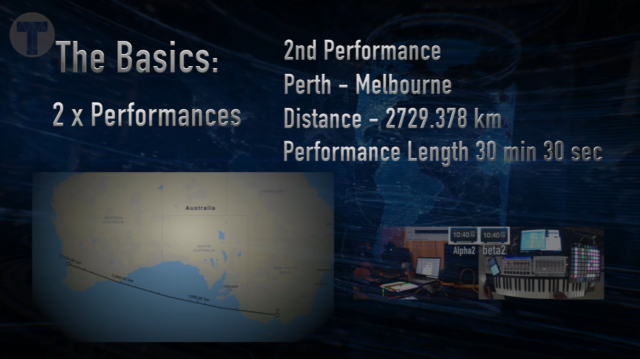
Two performances were undertaken in the Telemidi research, the first with each performer 7.5km (4.6 mi) apart, and the second 2,730km (1,696 mi) apart. Both were recorded and then analysed in detail (see video below), whereby aspects of performance parameters and methods were identified alongside several fundamental principles of Telematic performance. A stream of audio is generated from each node and each has been analysed in the video to identify the interplay between the two musicians, highlighting any variations in the music created and to recognize artefacts of network performance. It was noted that the music generated at each node was strikingly similar, although subtle variations in the rhythmic phrasing of bass, harmony and melody were common.
The Telemidi system ably accommodates all but the most obtrusive latency yet provides each musician with the capacity to co-create and Comprovise music in real-time across significant geographic distances. These performances showed constant interplay and the exchange of musical ideas, as can be seen in the 16 minute analysis video below, leaving the door open for many exciting possibilities in the future.
16min Video Analysis
Future Plans
The principles of Telemidi were the focus of Matt Bray in his 2017 Masters research. Now the Telemidi process has been proven to function, the landscape is open to allow for musicians to create and interact with each other in real-time scenarios regardless of their geographic locations.
The next steps are to:
+ Recruit keen MIDI-philes from around the globe to share and exchange knowledge in regards to the potentials of the Telemidi process (if this is you, please visit www.telemidi.org and leave a message)
+ Identify the most stable, low latency connections to The Internet available, to begin test performances across greater geographic regions
+ Refine and curate the infrastructure to suit various genres (from EDM to contemporary, also including live vocalists/musicians at each location)
+ Produce and promote simultaneous live performance events in capital cities, first nationally (Australia) and then internationally.
If you are at all interested in contributing to, or participating in the Telemidi process, please contact me, Matt Bray at www.telemidi.org, I’d love to hear from you and see what possibilities are achievable.
Thanks for checking out Telemidi!!
Matt Bray